You can now use the M5Stack Core in ESPHome
The M5Stack Core is a modular, stackable, ESP32 board with a 2 inch LCD screen and three buttons, all in a package that doesn't look bad in your living room. ESPHome is a system to configure your ESP8266/ESP32 with YAML files to connect them to your home automation system (MQTT or Home Assistant). As of ESPHome 1.16.0, released this week, ESPHome supports the M5Stack Core's ILI9341 display.
What this means is that you can now set up your own display device without having to solder (thanks to the M5Stack Core's all-in-one package) and without having to program (thanks to ESPHome's configuration-based approach), and let it talk to your home automation system, including advanced functionality such as over-the-air (OTA) updates. This is really bringing do-it-yourself home automation to the masses.
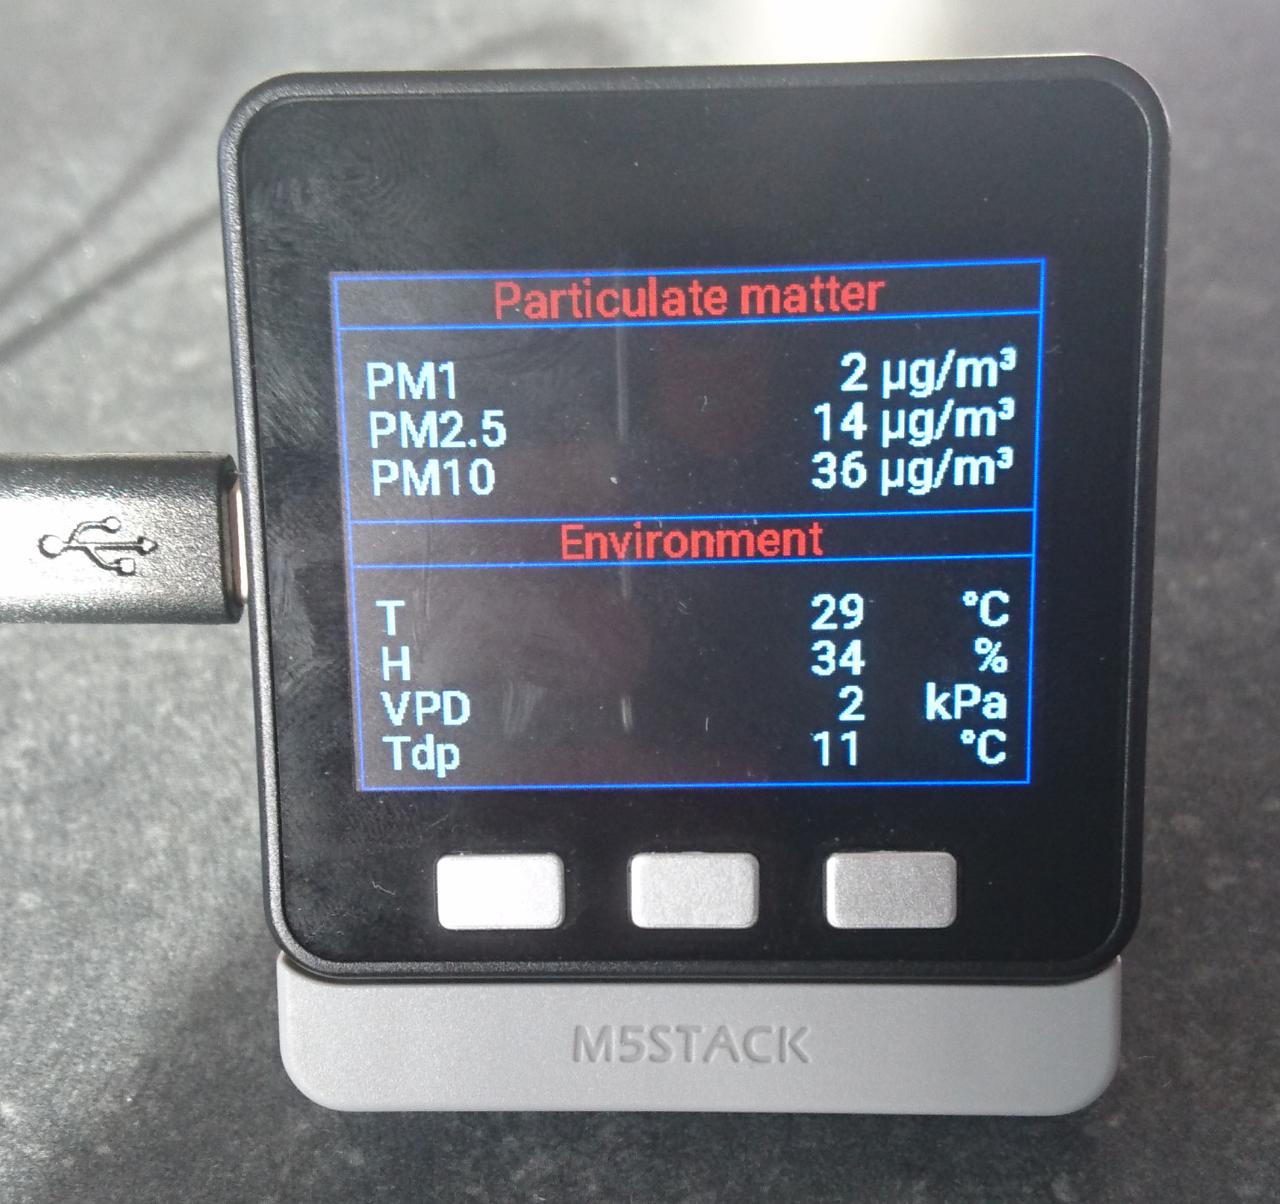
For an example, have a look at my ESPHome configuration for the M5Stack PM2.5 Air Quality Kit. I wrote it two months ago for the dev version of ESPHome, and I can confirm that this now just works with the 1.16.0 release. The result looks like this:
Using the display
The display is using the SPI bus, so you define it like this with the right clock, MOSI and MISO pins:
Then define a font: [1]
# Download Roboto font from https://fonts.google.com/specimen/Roboto
font:
  - file: "fonts/Roboto-Medium.ttf"
    id: font_roboto_medium22
    size: 22
    glyphs: '!"%()+,-_.:°0123456789ABCDEFGHIJKLMNOPQRSTUVWXYZ abcdefghijklmnopqrstuvwxyz/³µ'
Then you can define the display and add a lambda expression to show something on the screen:
display:
  - platform: ili9341
    id: m5stack_display
    model: M5Stack
    cs_pin: 14
    dc_pin: 27
    led_pin: 32
    reset_pin: 33
    rotation: 0
    lambda: |-
      Color RED(1,0,0);
      Color BLUE(0,0,1);
      Color WHITE(1,1,1);
      it.rectangle(0,  0, it.get_width(), it.get_height(), BLUE);
      it.rectangle(0, 22, it.get_width(), it.get_height(), BLUE);
      it.print(it.get_width() / 2, 11, id(font_roboto_medium22), RED, TextAlign::CENTER, "Particulate matter");