Getting started with ESPHome
Last week my new book has been published, Getting Started with ESPHome: Develop your own custom home automation devices. It demonstrates how to create your own home automation devices with ESPHome on an ESP32 microcontroller board.
I always like to look at the big picture. That's why I want to take some time to talk about what ESPHome is, why you should use it and what you need.
Configuring instead of programming
The ESP8266 and its successor, the ESP32, are a series of low-cost microcontrollers with integrated Wi-Fi (for both series) and Bluetooth (for the ESP32), produced by Espressif Systems. The maker community quickly adopted these microcontrollers for tasks where an Arduino didn't suffice. [1]
You can program the ESP8266 and ESP32 using Espressif's ESP-IDF SDK, the ESP32 Arduino core, or MicroPython. Arduino and MicroPython lower the bar significantly, but it still takes some programming experience to build solutions with these microcontrollers.
One of the domains in which the ESP8266 and ESP32 have become popular is in the DIY (do-it-yourself) home automation scene. You just have to connect a sensor, switch, LED, or display to a microcontroller board, program it, and there you have it: your customised home automation device.
However, "program it" isn't that straightforward as it sounds. For instance, if you're using the Arduino environment, which has a lot of easy-to-use libraries, you still have to know your way around C++.
Luckily there are a couple of projects to make it easier to create firmware for ESP8266 or ESP32 devices for home automation. One of these is ESPHome.
On its homepage, the ESPHome developers describe it as: "ESPHome is a system to control your ESP8266/ESP32 by simple yet powerful configuration files and control them remotely through Home Automation systems."
The fundamental idea of ESPHome is that you don't program your ESP8266 or ESP32 device, but configure it. Often you only have to configure which pins you have connected to a component, such as a sensor. You don't have to initialize the sensor, read its values in a loop, and process them.
Configuration is a completely different mindset than programming. It lowers the bar even more. With ESPHome, everyone can make home automation devices. [2]
Essentially ESPHome creates C++ code based on your configuration. The process looks like this:

So when you write a YAML file with your device's configuration, ESPHome generates C++ code from it. More specifically, ESPHome creates a PlatformIO project using the Arduino framework. PlatformIO then builds the C++ code, and esptool uploads the resulting firmware to your device.
You don't have to know anything about what's happening under the hood. You just have to write the configuration of your device in a YAML file and memorise a small number of commands to let ESPHome do the rest.
The advantages of ESPHome
Why use ESPHome? The first reason is clear from the project's description: because you don't need to be able to program. Even if you're a programmer, ESPHome offers many advantages:
- Works completely locally
-
Many commercial Wi-Fi-based home automation devices need a connection to a cloud service of the manufacturer. In contrast, ESPHome devices work locally and can communicate with a local home automation system such as Home Assistant or an MQTT-based home automation system.
- Offers on-device automations
-
Many home automation systems use a central gateway that contains all the logic, with automations like "if the sun goes down, close the blinds." In contrast, ESPHome offers powerful on-device automations. Your devices can work independently from a home automation gateway, so they keep working if they lose Wi-Fi access or if your home automation gateway crashes.
- Offers over-the-air updates
-
ESPHome includes out-of-the-box over-the-air (OTA) update functionality. This makes it easy to centrally manage your ESPHome devices and update the firmware. This means you don't have to go around your house with your laptop to connect a serial cable to each device and flash the firmware.
- Supports a lot of components
-
ESPHome supports many components out-of-the-box: several types of sensors, switches, and displays (even e-paper displays) are available with just a couple of configuration lines. The list of supported components is growing with every release.
- Has extensive documentation
-
The developers have documented every component in ESPHome, and this documentation is quite good.
- Is customisable
-
Although you create ESPHome firmware by writing a configuration file, ESPHome doesn't hide anything from you. It's still possible to add custom components that you write in C++. You can even look at the C++ code that ESPHome generates and change it.
What hardware do you need?
ESPHome creates custom firmware for the ESP8266 and ESP32 microcontrollers, so you need one of these. There are many types of boards for both microcontrollers, varying in the amount of flash memory, RAM, and available pins. Some of them even come with extras such as a built-in display (OLED, TFT, or e-paper), battery, or camera.
ESPHome doesn't support all features of all boards out-of-the-box. Technically, all ESP8266/ESP32 devices should be able to run ESPHome. Some features just aren't supported yet.
Your first choice is between the ESP8266 or ESP32. If you're buying a device at present, the choice is simple: the ESP32. It is much more capable than its predecessor and has a faster processor, more memory, more peripherals, and adds Bluetooth.
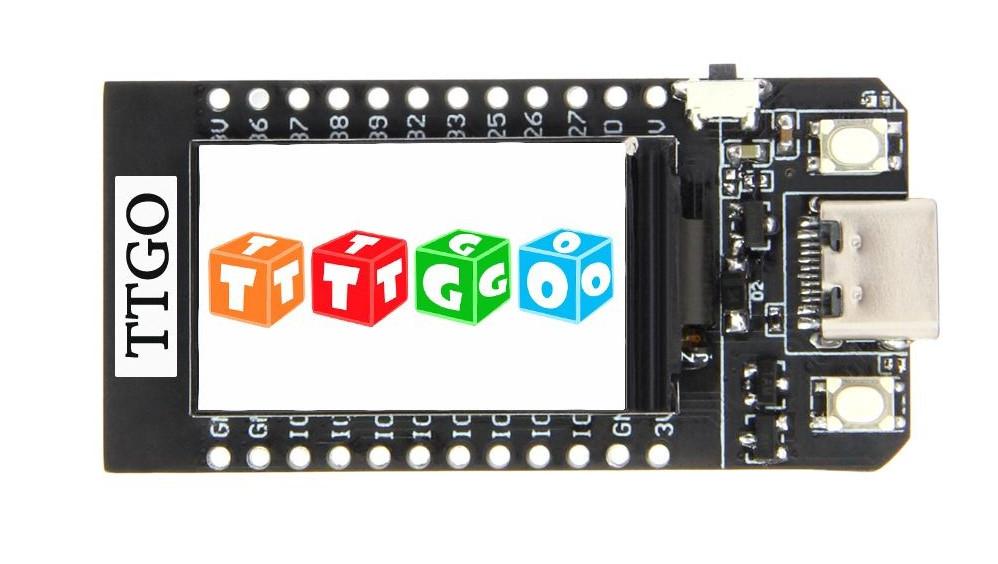
Then comes the choice of board. Espressif has some development boards. Many other companies are making them too. There are even complete kits such as the M5Stack series. These are ESP32 development boards ready to use in your living room in a case with a display, buttons, MicroSD card slot, and speaker. These are currently my favourite devices to use with ESPHome. If you don't need something with a nice finish as the M5Stack devices, the TTGO T-Display ESP32 made by LilyGO is my development board of choice: it has an integrated 1.14 inch TFT display.
Other interesting devices to run ESPHome on are devices from manufacturers such as Sonoff and Shelly. These come with firmware that works with the manufacturer's cloud services. You can however replace the firmware with ESPHome. This unlocks the full potential of these devices and lets you use them in your local home automation system without any link to a cloud system.
What software do you need?
You can use ESPHome to create a fully autonomous microcontroller project --- for example, a plant monitor that turns on an LED if the plant's soil is too dry. However, if you don't publish the plant's status over the network, this would be a waste of the ESP32's capabilities. The main usage cases of ESPHome are:
To send a device's sensor measurements to a home automation gateway.
To remotely control a device's lights or switches from a home automation gateway.
ESPHome supports two ways of communication between your device and the home automation gateway:
- Native API
-
The ESPHome native API is a highly optimised network protocol using Google's protocol buffers. It's meant to be used with Home Assistant --- a popular open-source home automation system.
- MQTT
-
MQTT (Message Queuing Telemetry Transport) is an OASIS standard messaging protocol designed with a lightweight publish/subscribe approach for messages. All your ESPHome devices then communicate with an MQTT broker such as Eclipse Mosquitto.
From the beginning (when it was still called esphomeyaml), the ESPHome project has been tightly integrated with Home Assistant, so the ESPHome developers prefer the native API. However, MQTT is fully supported, allowing your devices to communicate with many other home automation gateways, as MQTT is a popular standard. [3]
Do you need a development environment?
With ESPHome you don't program your devices but configure them. However, you still need something that looks like a "development" environment. When your device configurations are simple, you could do without, but the more complex they become, you'll need all the help you can get.
This doesn't mean you have to install a full-blown Integrated Development Environment (IDE). You should only need a couple of programs:
- An editor
-
You could make do with a simple text editor such as Notepad (Windows), TextEdit (macOS), or the default text editor on your Linux distribution. However, having an editor with syntax highlighting for YAML files is easier. Some examples are Notepad++ and Sublime Text. If you're a command-line user on Linux, both vim and Emacs work fine. [4] Use whatever you like, because your editor is an important tool to work with ESPHome.
- A YAML linter
-
A linter is a program that checks your file for the correct syntax. An editor with syntax highlighting has this linter built-in, but you can also run this standalone. A good YAML linter is the Python program yamllint. Not only does it check for syntax validity, but also weird things like key repetitions, as well as cosmetic problems such as line length, trailing spaces, and inconsistent indentation. ESPHome includes its own linter, specifically targeted at finding errors in ESPHome configurations. Both linters are complementary.
If you're used to developing in an IDE, an interesting alternative is the ESPHome plugin for Visual Studio Code. [5] This plugin provides validation and completion of what you type in an ESPHome YAML file. It also shows tooltips with help when you hover over keywords in the configuration.
