When it comes to home automation, people often end up with devices supporting the Zigbee or Z-Wave protocols, but those devices are relatively expensive. When I was looking for a way to keep an eye on the temperature at home a few years ago, I bought a bunch of cheap temperature and humidity sensors emitting radio signals in the unlicensed ISM (Industrial, Scientific, and Medical) frequency bands instead. Thanks to Benjamin Larsson's rtl_433 and, more recently, NorthernMan54's rtl_433_ESP and Florian Robert's OpenMQTTGateway, I was able to integrate their measurements easily into my home-automation system.
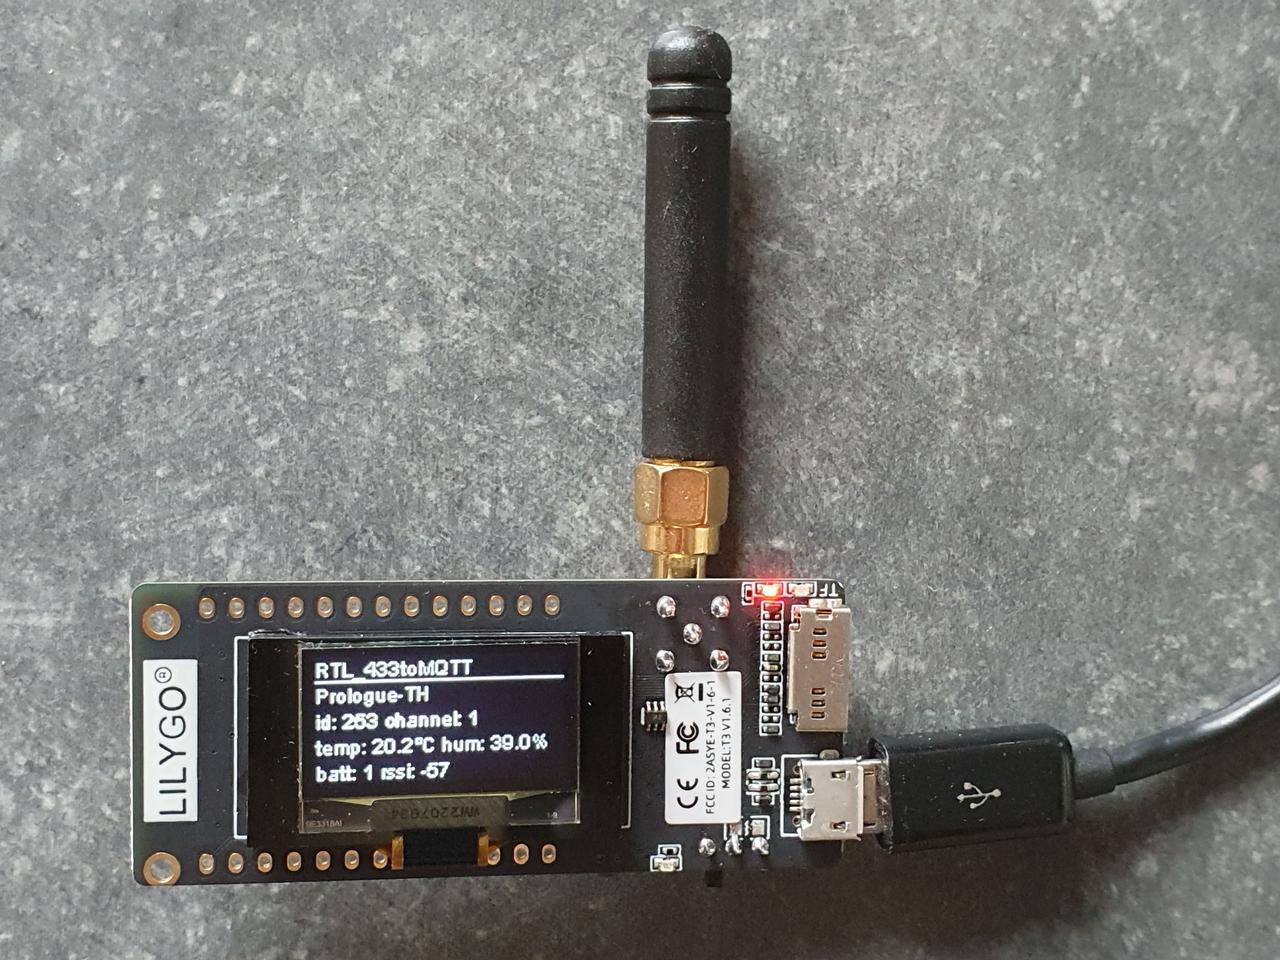
I wrote an article for LWN.net describing these projects and what you need to integrate them into your home-automation system such as Home Assistant: Using low-cost wireless sensors in the unlicensed bands. The article also describes how I'm migrating from a Raspberry Pi-based setup with RTL-SDR dongle running rtl_433 (as described in my home automation book Control Your Home with Raspberry Pi) towards a more distributed setup with multiple LILYGO boards with 433 MHz receiver and running the OpenMQTTGateway firmware around the house. They have less range than the RTL-SDR dongle, but they are cheap and all send their decoded sensor values to the same MQTT broker, so the result is the same as having a single receiver with a longer range.
The article doesn't go into detail about rtl_433_ESP, but this is a fairly recent and interesting development. While rtl_433 implements signal demodulation in software, rtl_433_ESP uses the transceiver chipset (SX127X on the LILYGO LoRa32 V2.1_1.6.1 433MHz board) to do this. This makes the ESP32 implementation more limited in the signals it can receive, because the transceiver only supports a single modulation scheme at a time. As NorthernMan54 had a lot of devices with OOK (on-off keying) modulation at the time he started the port and not one with FSK (frequency-shift keying) modulation, OOK devices are currently the only ones supported. More specifically, rtl_433_ESP supports rtl_433's Pulse Position Modulation (OOK_PPM), Pulse Width Modulation (OOK_PWM) and Pulse Manchester Zero Bit (OOK_PULSE_MANCHESTER_ZEROBIT) demodulation modules. This limits the available device decoders to 81 of the 234 decoders of rtl_433.
There are other microcontroller implementations of decoders for 433 MHz sensors, but the work NorthernMan54 has done building on rtl_433's code base and making it easy to use it with OpenMQTTGateway is impressive. NorthernMan54 told me he created some scripts that should help automate the port and keep his code synchronized with the roughly annual release cycle of rtl_433.
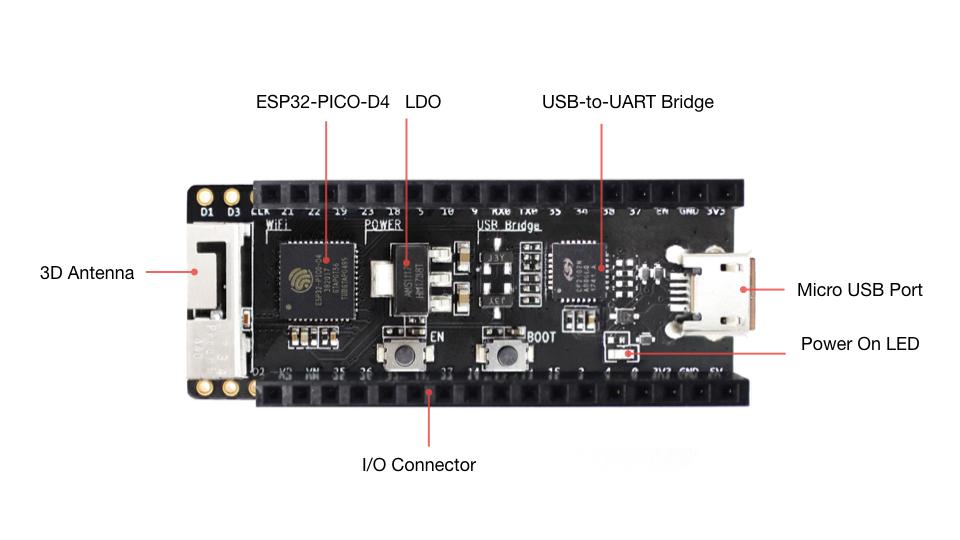
Today I wanted to program an ESP32 development board, the ESP-Pico-Kit v4, but when I connected it to my computer's USB port, the serial connection didn't appear in Linux. Suspecting a hardware issue, I tried another ESP32 board, the ESP32-DevKitC v4, but this didn't appear either, so then I tried another one, a NodeMCU ESP8266 board, which had the same problem. Time to investigate...
The dmesg output looked suspicious:
[14965.786079] usb 1-1: new full-speed USB device number 5 using xhci_hcd[14965.939902] usb 1-1: New USB device found, idVendor=10c4, idProduct=ea60, bcdDevice= 1.00[14965.939915] usb 1-1: New USB device strings: Mfr=1, Product=2, SerialNumber=3[14965.939920] usb 1-1: Product: CP2102 USB to UART Bridge Controller[14965.939925] usb 1-1: Manufacturer: Silicon Labs[14965.939929] usb 1-1: SerialNumber: 0001[14966.023629] usbcore: registered new interface driver usbserial_generic[14966.023646] usbserial: USB Serial support registered for generic[14966.026835] usbcore: registered new interface driver cp210x[14966.026849] usbserial: USB Serial support registered for cp210x[14966.026881] cp210x 1-1:1.0: cp210x converter detected[14966.031460] usb 1-1: cp210x converter now attached to ttyUSB0[14966.090714] input: PC Speaker as /devices/platform/pcspkr/input/input18[14966.613388] input: BRLTTY 6.4 Linux Screen Driver Keyboard as /devices/virtual/input/input19[14966.752131] usb 1-1: usbfs: interface 0 claimed by cp210x while 'brltty' sets config #1[14966.753382] cp210x ttyUSB0: cp210x converter now disconnected from ttyUSB0[14966.754671] cp210x 1-1:1.0: device disconnected
So the ESP32 board, with a Silicon Labs, CP2102 USB to UART controller chip, was recognized, and it was attached to the /dev/ttyUSB0 device, as it should normally do. But then suddenly the brltty command intervened and disconnected the serial device.
I looked up what brltty is doing, and apparently this is a system daemon that provides access to the console for a blind person using a braille display. When looking into the contents of the package on my Ubuntu 22.04 system (with dpkg -L brltty), I saw a udev rules file, so I grepped for the product ID of my USB device in the file:
So apparently there's a Braille display with the same CP210x USB to UART controller as a lot of microcontroller development boards have. And because this udev rule claims the interface for the brltty daemon, UART communication with all these development boards isn't possible anymore.
As I'm not using these Braille displays, the fix for me was easy: just find the systemd unit that loads these rules, mask and stop it.
$ systemctllist-units|grepbrltty
brltty-udev.service loaded active running Braille Device Support$ sudosystemctlmaskbrltty-udev.service
Created symlink /etc/systemd/system/brltty-udev.service → /dev/null.$ sudosystemctlstopbrltty-udev.service
After this, I was able to use the serial interface again on all my development boards.
For me, 2022 was the year of Bluetooth. [1] With all the talk about Matter, the one protocol to connect all home automation devices, this can sound strange. However, it will take years for Matter to become adopted, and in the mean time Bluetooth devices are everywhere.
Bluetooth Low Energy (BLE) is one of the most accessible wireless communication standards. There's no cost to access the official BLE specifications. Moreover, BLE chips are cheap, and the available development boards (based on an nRF5 or ESP32) and Raspberry Pis are quite affordable. [2] This means you can just start with BLE programming at minimal cost.
Another important factor is that BLE radio chips are ubiquitous. You can find them in smartphones, tablets, and laptops. This means that all those devices can talk to your BLE sensors or lightbulbs. Most manufacturers create mobile apps to control their BLE devices, which you can reverse engineer (as I explain in one of the chapters of my book).
You can also find BLE radios in many single-board computers, such as the Raspberry Pi, and in popular microcontroller platforms such as the ESP32. This makes it quite easy for you to create your own gateways for BLE devices. And platforms such as the Nordic Semiconductor nRF5 series of microcontrollers with BLE radio even make it possible to create your own battery-powered BLE devices.
Last but not least, while Bluetooth Low Energy is a complex technology with a comprehensive specification, getting started with the basics is relatively easy. I hope my book contributes to this by explaining the necessary groundwork and showing the right examples to create your own BLE applications.
I contributed to the Theengs project
I have been using OpenMQTTGateway at home for some time, which is a gateway for various wireless protocols that you can install on an ESP32 or other devices. This year OpenMQTTGateway spun out their BLE decoder to a separate project, Theengs Decoder. This is an efficient, portable and lightweight C++ library for BLE payload decoding.
I contributed to the Theengs Decoder project with some decoders for the following devices:
the RuuviTag environmental sensor (for the RAWv1 and RAWv2 format)
The Theengs project also created a gateway that you can run on a Linux machine such as a Raspberry Pi, Theengs Gateway. This leverages the same Theengs Decoder as OpenMQTTGateway. I quickly adopted this solution as an alternative to bt-mqtt-gateway (which I contributed to with RuuviTag support earlier), and I started contributing to the project. Amongst others, I:
I also started Theengs Explorer under the Theengs umbrella. This is a text user interface to discover BLE devices and show their raw advertisement data and the data as decoded by Theengs Decoder. This project is still in early development, because I wrote this using a pre-0.2 release of Textual, and I still have to rewrite it.
I wrote some Python packages for Bluetooth
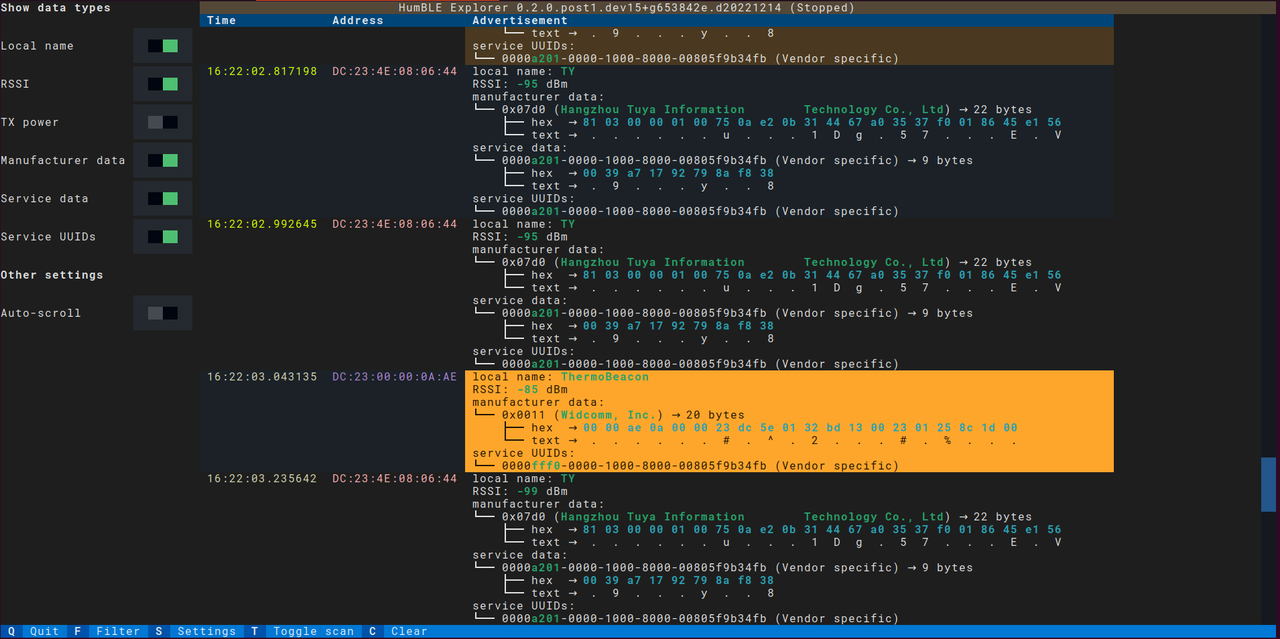
Outside the Theengs project, I created two Python packages related to Bluetooth this year. After I struggled with updating the Theengs Explorer code base to the new Textual 0.2 release, I decided to start from scratch with a 'simple' Bluetooth Low Energy scanner. This became HumBLE Explorer, which is a cross-platform, command-line and human-friendly Bluetooth Low Energy scanner, looking like this:
Textual is quite neat. It lets you create interactive applications for the terminal, with widgets such as checkboxes and input fields, a CSS-like layout language, and even mouse support. Moreover, it runs on Linux, Windows and macOS. Although I'm personally only using Linux at home, I find it important that my applications are cross-platform. That's also the reason why this application, as well as all my Bluetooth work with Python, is based on Bleak, which supports the same three operating systems.
Now that HumBLE Explorer is working, I'll revisit Theengs Explorer soon, and update it to the new Textual version with the knowledge that I gained.
A second Bluetooth project that I have been working on this year, even before HumBLE Explorer or Theengs Explorer, is bluetooth-numbers. It's a Python package with a wide set of numbers related to Bluetooth, so Python projects can easily use these numbers. The goal of this project is to provide a shared resource so various Python projects that deal with Bluetooth don't have to replicate this effort by rolling their own database and keeping it updated.
Luckily Nordic Semiconductor already maintains the Bluetooth Numbers Database for Company IDs, Service UUIDs, Characteristic UUIDs and Descriptor UUIDs. My bluetooth-numbers package started as a Python wrapper around this project, by generating Python modules with these data. In the mean time, I extended the package with some SDO Service UUIDs and Member Service UUIDs I extracted from the Bluetooth Assigned Numbers document (but which I'll probably upstream to the Bluetooth Numbers Database), as well as the IEEE database of OUIs for prefixes of Bluetooth addresses.
So you now can install the package from PyPI with pip:
pipinstallbluetooth-numbers
Then you can get the description of a company ID in your Python code:
I'm using bluetooth-numbers in HumBLE Explorer and Theengs Explorer to show human-readable descriptions of these numbers in the interface. I hope that other Python projects related to Bluetooth will adopt the package too, to prevent everyone from having to keep their own numbers database updated.
I'm keeping the package updated with its various sources, and it has a test suite with 100% code coverage. Contributions are welcome. The API documentation shows how to use it.
Bluetooth developments in Home Assistant and ESPHome
The biggest BLE addition in 2022 was Bluetooth Proxy in ESPHome 2022.8. This allows you to use your ESP32 devices with ESPHome firmware as BLE extenders for Home Assistant. Each ESPHome Bluetooth proxy device forwards the BLE advertisements it receives to your Home Assistant installation. By strategically placing some devices in various places at home, you can expand the Bluetooth range of your devices this way. [3]
Starting from ESPHome 2022.9 the Bluetooth proxy also supports active connections: it lets Home Assistant connect to your devices that are out of reach of your home automation gateway, as long as one of your Bluetooth proxy devices are in reach of the device you want to connect to.
Another interesting initiative coming from the Home Assistant project is BTHome, a new open standard for broadcasting sensor data over BLE. Raphael Baron's open-source soil moisture sensor b-parasite already adopted the BTHome standard, as did the custom firmware ATC MiThermometer for various Xiaomi temperature sensors. With the BTHome integration in Home Assistant 2022.9, devices advertising in this format will be automatically discovered in your Home Assistant installation.
BTHome's data format is documented in detail, with various data types supported. There's even support for encryption, using AES in CCM mode with a pre-shared key. The bthome-ble project implements a parser for BTHome payloads you can use in your own Python projects. I applaud the initiative to create an open standard for BLE sensor advertisements, and I hope that many open-source devices will adopt BTHome. I will definitely use the format if I create a BLE broadcaster instead of coming up with my own data format.
I also found it interesting to see that Home Assistant decided to move to Bleak as their BLE library. They even sponsored the lead developer David Lechner to implement passive scanning in the Linux backend. This benefits the broader open-source community and allowed me to add passive scanning support to Theengs Gateway, Theengs Explorer and HumBLE Explorer. With Home Assistant as a big user of Bleak, we'll surely see it improving even more. And Bleak is already the best Python library for BLE...
What with BLE in 2023?
I expect that Bluetooth will still remain an important technology in 2023 and further, because I don't see anything changing about the unique combination of accessibility, ubiquity and easy basics. So I will keep contributing to the Theengs project and developing my own Bluetooth projects.
I still have a couple of BLE sensors at home that aren't supported yet by Theengs Decoder, and I'd like to change that! If you have a device that isn't on the list of supported devices, why don't you try adding a decoder? You don't need to be a developer to do this, as the decoders are specifications of the advertisement format in a JSON file.
When I started learning how to develop Bluetooth Low Energy (BLE) applications with Zephyr RTOS, I was immediately impressed by the excellent documentation and the wealth of sample code of this open source real-time operating system. But what really got me understand the way of working with BLE on Zephyr was just going through each line of code in a sample and find out the corresponding definition in Zephyr's header files, which are surprisingly readable.
As an exercise in this approach, I want to go through the iBeacon sample application with you. You'll find that this deceptively simple application already hides a lot of details that are important to know before starting with more complex Zephyr code.
Here's the sample code to broadcast an iBeacon advertisement:
/* * Copyright (c) 2018 Henrik Brix Andersen <henrik@brixandersen.dk> * * SPDX-License-Identifier: Apache-2.0 */#include<zephyr/types.h>#include<stddef.h>#include<zephyr/sys/printk.h>#include<zephyr/sys/util.h>#include<zephyr/bluetooth/bluetooth.h>#include<zephyr/bluetooth/hci.h>#ifndef IBEACON_RSSI#define IBEACON_RSSI 0xc8#endif/* * Set iBeacon demo advertisement data. These values are for * demonstration only and must be changed for production environments! * * UUID: 18ee1516-016b-4bec-ad96-bcb96d166e97 * Major: 0 * Minor: 0 * RSSI: -56 dBm */staticconststructbt_dataad[]={BT_DATA_BYTES(BT_DATA_FLAGS,BT_LE_AD_NO_BREDR),BT_DATA_BYTES(BT_DATA_MANUFACTURER_DATA,0x4c,0x00,/* Apple */0x02,0x15,/* iBeacon */0x18,0xee,0x15,0x16,/* UUID[15..12] */0x01,0x6b,/* UUID[11..10] */0x4b,0xec,/* UUID[9..8] */0xad,0x96,/* UUID[7..6] */0xbc,0xb9,0x6d,0x16,0x6e,0x97,/* UUID[5..0] */0x00,0x00,/* Major */0x00,0x00,/* Minor */IBEACON_RSSI)/* Calibrated RSSI @ 1m */};staticvoidbt_ready(interr){if(err){printk("Bluetooth init failed (err %d)\n",err);return;}printk("Bluetooth initialized\n");/* Start advertising */err=bt_le_adv_start(BT_LE_ADV_NCONN,ad,ARRAY_SIZE(ad),NULL,0);if(err){printk("Advertising failed to start (err %d)\n",err);return;}printk("iBeacon started\n");}voidmain(void){interr;printk("Starting iBeacon Demo\n");/* Initialize the Bluetooth Subsystem */err=bt_enable(bt_ready);if(err){printk("Bluetooth init failed (err %d)\n",err);}}
First, this includes a couple of header files. Then the code defines the IBEACON_RSSI constant, which sets the measured power in the iBeacon advertisement. The value 0xc8 is equal to decimal value 200. As this field in the iBeacon specification's advertising data structure is encoded as a signed integer, this is interpreted as 200 - 256 = -56 dBm.
Advertising data structures in Zephyr
Then, you see the definition of an array of struct bt_data elements. The bt_data struct describes an advertising data structure with a type, length, and a pointer to the data. Its definition (in zephyr/bluetooth/bluetooth.h) is:
/** Description of different data types that can be encoded into * advertising data. Used to form arrays that are passed to the * bt_le_adv_start() function. */structbt_data{uint8_ttype;uint8_tdata_len;constuint8_t*data;};
In the iBeacon program, the array consists of two elements. This is consistent with the iBeacon specification, which shows that an iBeacon advertising packet consists of two advertising structures: flags and manufacturer-specific data.
In principle, you could fill the array with bt_data structs you create yourself, but Zephyr defines some helper macros. Their definition (again, from zephyr/bluetooth/bluetooth.h) looks like this:
/** @brief Helper to declare elements of bt_data arrays * * This macro is mainly for creating an array of struct bt_data * elements which is then passed to e.g. @ref bt_le_adv_start(). * * @param _type Type of advertising data field * @param _data Pointer to the data field payload * @param _data_len Number of bytes behind the _data pointer */#define BT_DATA(_type, _data, _data_len) \ { \ .type = (_type), \ .data_len = (_data_len), \ .data = (const uint8_t *)(_data), \ }/** @brief Helper to declare elements of bt_data arrays * * This macro is mainly for creating an array of struct bt_data * elements which is then passed to e.g. @ref bt_le_adv_start(). * * @param _type Type of advertising data field * @param _bytes Variable number of single-byte parameters */#define BT_DATA_BYTES(_type, _bytes...) \ BT_DATA(_type, ((uint8_t []) { _bytes }), \ sizeof((uint8_t []) { _bytes }))
So, with the BT_DATA macro, you construct a bt_data struct with the type, data, and data length you specify (using a pointer to the data). BT_DATA_BYTES is a macro that uses the BT_DATA macro and automatically fills it with the right length for data with a known size.
If you return to the iBeacon program, you see that it fills the array with two elements using the BT_DATA_BYTES macro.
The first element is of type BT_DATA_FLAGS and with data BT_LE_AD_NO_BREDR. You can find the definition of these constants in zephyr/bluetooth/gap.h (GAP stands for Generic Access Profile). For non-connectable advertising packets, the flags data structure is optional.
The second element is of type BT_DATA_MANUFACTURER_DATA. The data used to construct this element follows the format listed in the iBeacon specification: Apple's two-byte company ID, the type (0x02), and length (0x15 or 21 bytes) for the iBeacon data type, and then the UUID, major, minor, and measured power.
All in all, the result of all these macros is an array with advertising data structures that looks like this, schematically:
An iBeacon packet's advertisement data in Zephyr
Enabling Bluetooth
Until now, the code has been all about setting up the right data structures to advertise. Let's have a look at the main() function. This actually does just one thing: calling the bt_enable() function. You have to call this function before any other calls that use the board's Bluetooth hardware. It initializes the Bluetooth subsystem and returns 0 on success and a negative error code otherwise.
The argument to the bt_enable() function is a callback function that's called when initializing Bluetooth is completed. It's in this callback function, bt_ready(), that the core of the program resides.
Advertising
The callback function is called with one argument -- an error code that is 0 on success, or an error code consisting of a negative value otherwise. So, in bt_ready(), you first check whether Bluetooth initialization failed, and, if not, you start advertising.
The definition of bt_le_adv_start() (still in zephyr/bluetooth/bluetooth.h), the function used to start advertising, is:
/** @brief Start advertising * * Set advertisement data, scan response data, advertisement parameters * and start advertising. * * When the advertisement parameter peer address has been set the advertising * will be directed to the peer. In this case advertisement data and scan * response data parameters are ignored. If the mode is high duty cycle * the timeout will be @ref BT_GAP_ADV_HIGH_DUTY_CYCLE_MAX_TIMEOUT. * * @param param Advertising parameters. * @param ad Data to be used in advertisement packets. * @param ad_len Number of elements in ad * @param sd Data to be used in scan response packets. * @param sd_len Number of elements in sd * * @return Zero on success or (negative) error code otherwise. * @return -ENOMEM No free connection objects available for connectable * advertiser. * @return -ECONNREFUSED When connectable advertising is requested and there * is already maximum number of connections established * in the controller. * This error code is only guaranteed when using Zephyr * controller, for other controllers code returned in * this case may be -EIO. */intbt_le_adv_start(conststructbt_le_adv_param*param,conststructbt_data*ad,size_tad_len,conststructbt_data*sd,size_tsd_len);
So, to call this function, you need to supply advertising parameters, the advertising data structure's array and its length, as well as the array of data structures for the scan response packet and its length.
The iBeacon example program doesn't use any scan response data, so the last two arguments are NULL and 0. The array of advertising data structures is ad, which you constructed in the beginning of the code. With ARRAY_SIZE, a macro defined in zephyr/sys/util.h, you compute the number of elements in the array. When using a C compiler, this macro is defined as:
The first argument to the bt_le_adv_start() function specifies the advertising parameters. In this example, this argument is BT_LE_ADV_NCONN. If you look up its definition in zephyr/bluetooth/bluetooth.h, you'll see that this defines non-connectable advertising with a private address:
The macro BT_LE_ADV_PARAM is another helper macro:
/** * @brief Helper to declare advertising parameters inline * * @param _options Advertising Options * @param _int_min Minimum advertising interval * @param _int_max Maximum advertising interval * @param _peer Peer address, set to NULL for undirected advertising or * address of peer for directed advertising. */#define BT_LE_ADV_PARAM(_options, _int_min, _int_max, _peer) \ ((struct bt_le_adv_param[]) { \ BT_LE_ADV_PARAM_INIT(_options, _int_min, _int_max, _peer) \ })
This teaches you that BT_GAP_ADV_FAST_INT_MIN_2 and BT_GAP_ADV_FAST_INT_MAX_2 are the minimum and maximum advertising interval. You can find their definitions in zephyr/bluetooth/gap.h:
#define BT_GAP_ADV_FAST_INT_MIN_2 0x00a0 /* 100 ms */#define BT_GAP_ADV_FAST_INT_MAX_2 0x00f0 /* 150 ms */
So, your iBeacon will use an advertising interval of between 100 ms and 150 ms.
BT_LE_ADV_PARAM uses another macro in the same header file, BT_LE_ADV_PARAM_INIT, and its definition is:
All in all, this means that the code starts non-connectable advertising with its default Bluetooth ID, a private address, no special advertising options, and with an advertising interval of between 100 ms and 150 ms.
Summary
When reading source code of Zephyr applications, you can definitely feel discouraged by all these macros at first. However, after you've seen a couple of Zephyr programs, you start to see how they all fit together. The beauty of Zephyr is that its source code is completely open. If you don't understand what a specific macro or function is doing, just look up its declaration in the header file or even in the corresponding C file where it's implemented.
This approach has thought me a lot about developing Bluetooth Low Energy applications with Zephyr. I hope it will be a useful approach to you too.
Many Bluetooth Low Energy (BLE) devices broadcast data using manufacturer-specific data or service data in their advertisements. The data format is often defined in a specification or should be reverse-engineered.
If you want to decode the binary data format into usable chunks of data from various data types in your own Python program, I find the Construct library quite an accessible solution. And Bleak is my favorite BLE library in Python, so first install Bleak and Construct:
pip3installbleakconstruct
As an example, let's see how you could decode iBeacon advertisements with Bleak and Construct in Python.
The iBeacon specification
The iBeacon specification, published by Apple, is officially called Proximity Beacon. The idea is to have Bluetooth beacons advertise their presence in order to calculate their approximate distance. You can find the iBeacon specification online.
The specification lists the format of the iBeacon advertising packet. This always consists of two advertising data structures: flags (of length 2) and manufacturer-specific data (of length 26). That’s why an iBeacon advertising packet is always 30 bytes long (1 + 2 + 1 + 26). Here's the structure of the complete packet:
We're specifically interested in the second data structure with type 0xff, which signifies that it's manufacturer-specific data. The first two bytes of these manufacturer-specific data are always the company ID. To know which company ID is linked to which company, consult the list of all registered company identifiers. Normally the company ID is the ID of the manufacturer of the device. However, Apple allows other manufacturers to use its company ID for iBeacon devices if they agree to the license.
If you want to know more about the meaning of the iBeacon packet's fields, consult the document Getting Started with iBeacon published by Apple.
Decoding iBeacon advertisements
Now that you know the format, let's see how to scan for iBeacon advertisements and decode them:
"""Scan for iBeacons.Copyright (c) 2022 Koen VervloesemSPDX-License-Identifier: MIT"""importasynciofromuuidimportUUIDfromconstructimportArray,Byte,Const,Int8sl,Int16ub,Structfromconstruct.coreimportConstErrorfrombleakimportBleakScannerfrombleak.backends.deviceimportBLEDevicefrombleak.backends.scannerimportAdvertisementDataibeacon_format=Struct("type_length"/Const(b"\x02\x15"),"uuid"/Array(16,Byte),"major"/Int16ub,"minor"/Int16ub,"power"/Int8sl,)defdevice_found(device:BLEDevice,advertisement_data:AdvertisementData):"""Decode iBeacon."""try:apple_data=advertisement_data.manufacturer_data[0x004C]ibeacon=ibeacon_format.parse(apple_data)uuid=UUID(bytes=bytes(ibeacon.uuid))print(f"UUID : {uuid}")print(f"Major : {ibeacon.major}")print(f"Minor : {ibeacon.minor}")print(f"TX power : {ibeacon.power} dBm")print(f"RSSI : {device.rssi} dBm")print(47*"-")exceptKeyError:# Apple company ID (0x004c) not foundpassexceptConstError:# No iBeacon (type 0x02 and length 0x15)passasyncdefmain():"""Scan for devices."""scanner=BleakScanner()scanner.register_detection_callback(device_found)whileTrue:awaitscanner.start()awaitasyncio.sleep(1.0)awaitscanner.stop()asyncio.run(main())
First it defines a Struct object from the Construct library, and calls it ibeacon_format. A Struct is a collection of ordered and usually named fields. [1] Each field in itself is an instance of a Construct class. This is how you define the data type of bytes in an iBeacon data structure. In this case the fields are:
Const(b"\x02\x15"): a constant value of two bytes, because these are always fixed for an iBeacon data structure.
Array(16, Byte): an array of 16 bytes that define the UUID.
Int16ub for both the major and minor numbers, which are both unsigned big-endian 16-bit integers.
Int8sl for the measured power, which is a signed 8-bit integer.
Now when the device_found function receives manufacturer-specific data from Apple, it can easily parse it. It just calls the parse function on the ibeacon_format object, with the bytes of the manufacturer-specific data as its argument. The result is an object of the class construct.lib.containers.Container, with the fields that are defined in the ibeacon_format struct. That's why you can just refer to the fields like ibeacon.major, ibeacon.minor and ibeacon.power.
However, ibeacon.uuid returns a construct.lib.containers.ListContainer object, which is printed as a list of separate numbers. To print it like a UUID, first convert it to bytes and then create a UUID object from these bytes.
If you run this program, it will scan continuously for iBeacons and shows their information:
What does one do on a free Saturday afternoon? Upgrading Linux machines of course! I thought upgrading my Ubuntu 20.04 LTS laptop to Ubuntu 22.04 LTS would be a routine task I could keep running in the background, but... computer said no.
The first hurdle was starting the upgrade:
$ sudodo-release-upgrade
Checking for a new Ubuntu releaseThere is no development version of an LTS available.To upgrade to the latest non-LTS development releaseset Prompt=normal in /etc/update-manager/release-upgrades.
I was puzzled: although Ubuntu 22.04 has been released three months ago, Ubuntu 20.04 doesn't detect this as a new release. It took some digging around to discover that apparently upgrades from one LTS release to the next one are only available after the first point release. So in this case, Ubuntu 20.04 will not detect a newer version until Ubuntu 22.04.1 is released, which is scheduled for August 4.
Luckily you're still able to upgrade, you just have to ask for the development version:
$ sudodo-release-upgrade-d
Ok, so after this first hurdle I thought this was the most exciting part of the upgrade, but I was wrong. I'm not sure what the problem was, but after all packages had been downloaded and when the upgrade process was in the middle of applying the package upgrades, the screen became grey and showed the message "Something has gone wrong. Please logout and try again." I had to restart Ubuntu and it even didn't reach the login screen, just showing me a grey screen.
This all looked familiar. [1] I encountered exactly the same problem two years ago while upgrading Ubuntu 19.10 to Ubuntu 20.04 LTS. So luckily I could take the blog article I wrote then as a guideline for the recovery process. However, the fix was slightly more complex this time. These are my notes of fixing this.
First reboot your computer and start Ubuntu in recovery mode:
Hold the Shift key while booting the PC.
In the GRUB boot menu that appears, choose the advanced options and then recovery mode.
In the recovery menu that appears, enable networking first and then choose the option to open a root shell.
Because the installation has been aborted, I tried fixing a broken install:
# apt--fix-brokeninstall
While last time this fixed the issue, I now encountered an error about the Firefox package. Ubuntu decided to switch Firefox to a snap package, and apparently apt wasn't able to install the new deb package that installs the snap. As a temporary workaround, I removed Firefox and ran the apt command again:
# aptremovefirefox
# apt--fix-brokeninstall
This still resulted in the same error, so my next idea was to prevent the upgrade process from installing Firefox. So I created the apt preference file /etc/apt/preferences.d/firefox-no-snap.pref with the following configuration:
A while ago I bought an external webcam with better image quality than the one built into my laptop. However, when I wanted to use it on my Linux system, I faced an unexpected problem. Not all programs or web sites allowed me to choose which webcam to use. And even worse: the ones that didn't give me the choice automatically chose the first available webcam device, /dev/video0, which is of course the internal webcam.
Luckily there's a solution for everything in Linux. I just had to find a way to disable the internal webcam. My idea was that the external webcam would then become the first available webcam device and this would then be chosen automatically.
So I first looked at the product information of all connected USB devices:
As you see, the first two devices are webcams. The HD Pro Webcam C920 is the external one, while the Chicony USB2.0 Camera is the internal one. I wanted to disable the latter. The file with the product information for this webcam is /sys/bus/usb/devices/1-7/product, and I needed the code 1-7 in its path. This means that the device is connected on USB bus 1 port 7.
With this information I could send a command to the USB driver to unbind the port:
After this, the internal webcam isn't found anymore by software or web sites. If I connect the external webcam after this command, it gets assigned /dev/video0 as the device file.
Re-enabling the internal webcam is easy too:
$ echo'1-7'|sudotee/sys/bus/usb/drivers/usb/bind
This is the same command as the previous one, but with bind instead of unbind in the path.
To make this easier to remember, I created a small shell script, webcam.sh:
After making it executable with chmod +x webcam.sh, I could just run webcam.sh disable before connecting the external webcam every time I wanted to use it. And after disconnecting the external webcam, I could always re-enable the internal webcam with webcam.sh enable, but I never bothered with it.
I used the script for a while like this, until I realized I could even run this script automatically every time I connected or disconnected the external webcam, thanks to a udev rule.
So I added the following udev rule to /etc/udev/rules.d/99-disable-internal-webcam.rules:
I found the correct value for ENV{PRODUCT} in the output of udevadm monitor --kernel--property--subsystem-match=usb while connecting or disconnecting the external webcam.
So now I never have to bother with disabling, enabling or choosing a webcam device. If my external webcam isn't connected, all software chooses the internal webcam. As soon as I connect the external webcam, the software chooses this one. And as soon as I disconnect the external webcam, the software chooses the internal webcam again.
If you want to receive Bluetooth Low Energy sensor measurements, there's a new project you can use: Theengs Gateway. It uses Theengs Decoder, an efficient, portable and lightweight C++ library for BLE payload decoding, and it publishes the decoded data as MQTT messages. It already supports 40 BLE devices, including RuuviTags, iBeacons, and various Xiaomi devices.
Recently Mihai Ambrosie created a Theengs Gateway add-on for Home Assistant, so you can install it easily. The installation process goes like this:
Click on Settings / Add-ons in Home Assistant and then Add-on Store at the bottom right. Click on the three dots at the top right and then Repositories.
Click on TheengsGateway in the list of add-ons and then Install.
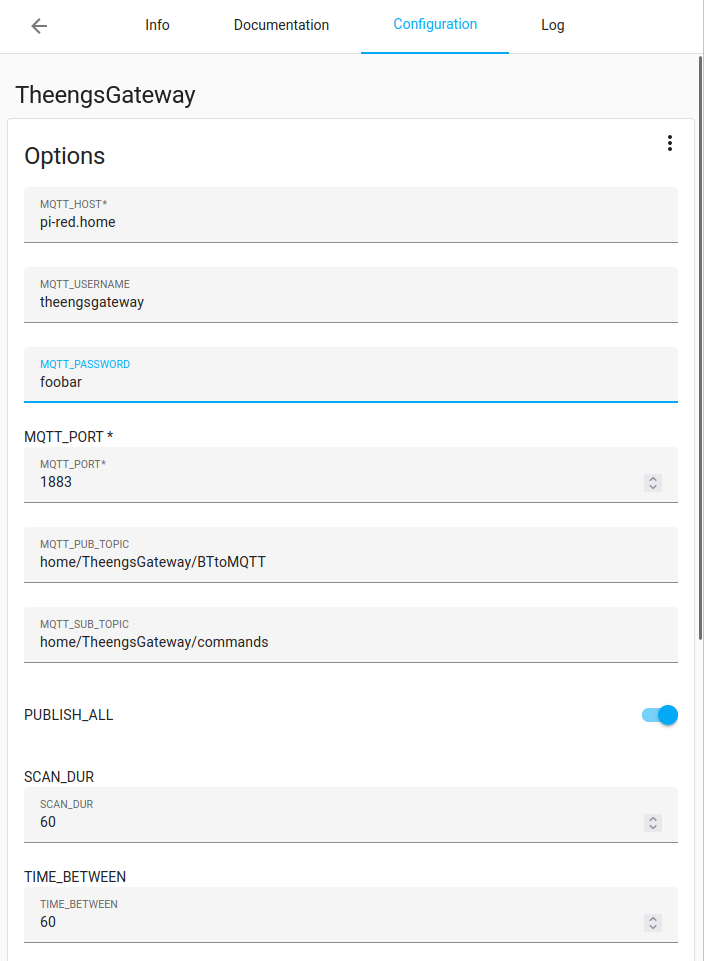
After the installation is complete, open the Configuration tab of the add-on and enter the host and port of your MQTT broker and optionally a username and password. [1] You can also change some parameters such as the base of the MQTT topics, the scan duration and the time between scans, and a filter for devices that you don't want to be discovered by Home Assistant because they're too numerous. [2]
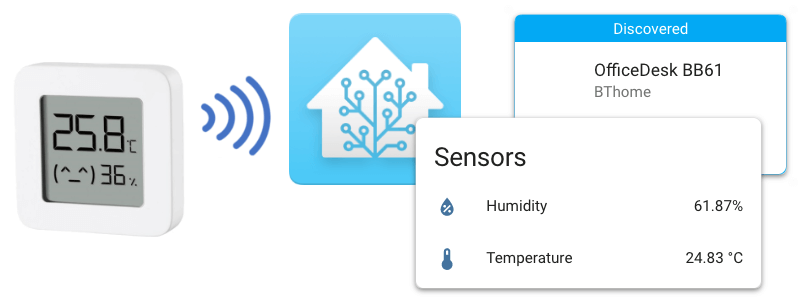
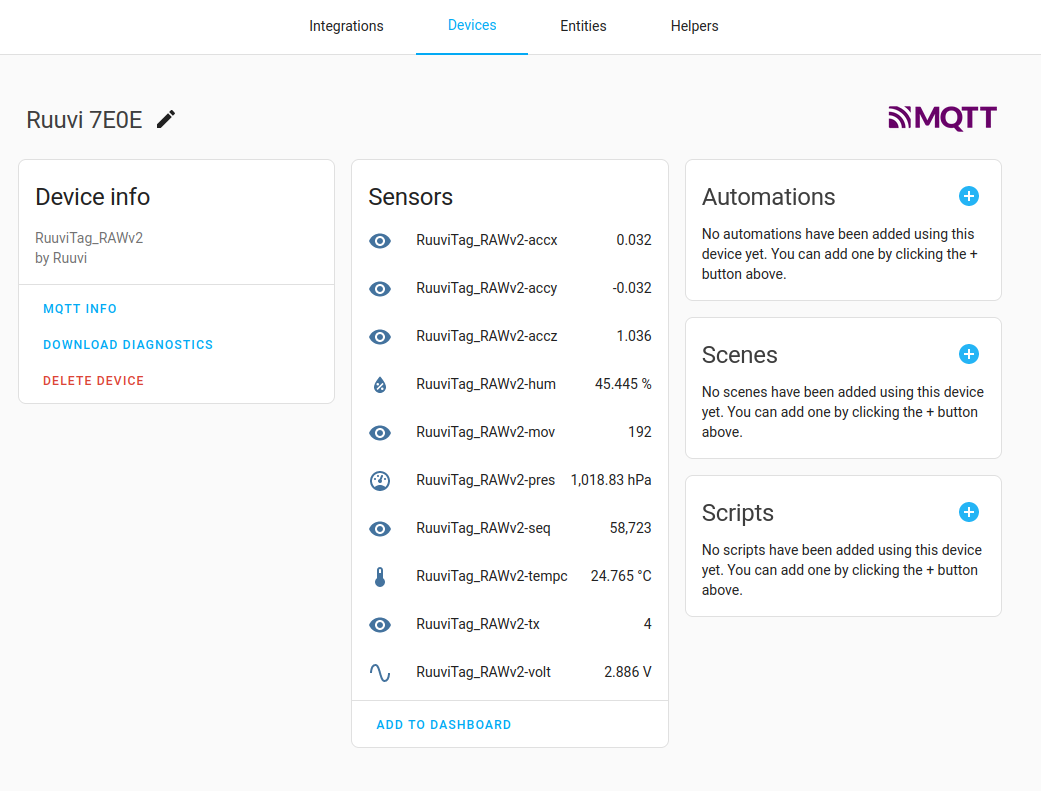
Click on Save to save the configuration and then click on Start in the Info tab to start the add-on. After this, all BLE devices that Theengs Gateway detects are automatically discovered by Home Assistant, and you can find them in Settings / Devices & Services. Look at the Devices and Entities tabs:
Bluetooth Low Energy (BLE) is one of the most accessible wireless communication standards. You don't need any expensive equipment to develop BLE devices such as wireless sensor boards, proximity beacons, or heart rate monitors. All you need is a computer or a Raspberry Pi, an ESP32 microcontroller board, or a development board with a Nordic Semiconductor nRF5 (or an equivalent BLE SoC from another manufacturer).
On the software side, BLE is similarly accessible. Many development platforms, most of them open source, offer an API (application programming interface) to assist you in developing your own BLE applications. This book shows you the ropes of Bluetooth Low Energy programming with Python and the Bleak library on a Raspberry Pi or PC, with C++ and NimBLE-Arduino on Espressif's ESP32 development boards, and with C on one of the development boards supported by the Zephyr real-time operating system, such as Nordic Semiconductor's nRF52 boards.
While Bluetooth Low Energy is a complex technology with a comprehensive specification, getting started with the basics is relatively easy. This book takes a practical approach to BLE programming to make the technology even more approachable. With a minimal amount of theory, you'll develop code right from the start. After you've completed this book, you'll know enough to create your own BLE applications.
What is Bluetooth Low Energy?
Bluetooth is a wireless communication standard in the 2.4 GHz Industrial, Scientific, and Medical (ISM) frequency band. These days, if you hear about Bluetooth support in a product, this almost always is Bluetooth Low Energy (BLE). It's a radical departure from the original Bluetooth standard, which is now called Classic Bluetooth.
Bluetooth Low Energy and Classic Bluetooth are actually different protocols. Classic Bluetooth is essentially a wireless version of the traditional serial connection. If you want to print a document, transfer a file or stream audio, you want this to happen as fast as possible. Therefore, the focus of development in Classic Bluetooth was on attaining faster and faster speeds with every new version.
However, Classic Bluetooth wasn't a good fit for devices with low power consumption, for instance those powered by batteries. That's why Nokia adapted the Bluetooth standard to enable it to work in low-power scenarios. In 2006, they released their resulting technology onto the market, dubbed Wibree.
The Bluetooth Special Interest Group (SIG), the organization that maintains the Bluetooth specifications, showed interest in this new development. After consulting with Nokia, they decided to adopt Wibree as part of Bluetooth 4.0, with a new name, Bluetooth Low Energy. Classic Bluetooth remained available for high-throughput applications.
Layered architecture
The Bluetooth Core Specification is more than 3200 pages long. And this is only the core specification; there are many supplemental documents for BLE. However, BLE has a layered architecture. Many end-user applications only use the upper layers, so you don't need to know the details of the architecture's lower layers.
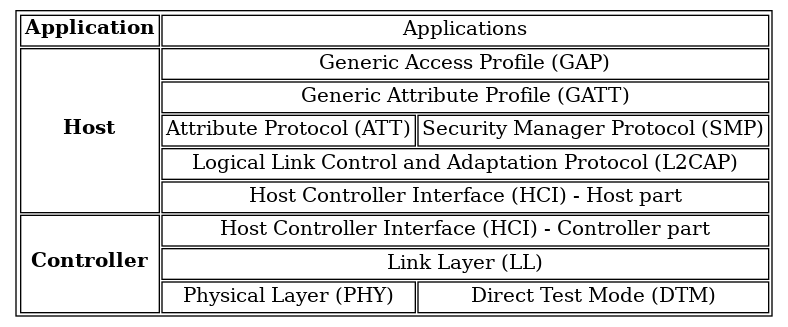
The BLE architecture consists of three main blocks: controller, host, and application.
Controller
This has the lower-level layers: the Physical Layer (PHY), Link Layer (LL) and Direct Test Mode (DTM). These are the layers where the Bluetooth radio does its work. The controller communicates with the outside world using the antenna, in a frequency band around 2.4 GHz. It communicates with the host using a standardized interface between the two blocks: the Host Controller Interface (HCI). [1]
Host
This is the block with which the end user or application developer comes in contact. The Logical Link Control and Adaptation Protocol (L2CAP) defines channels and signaling commands. On top of it, the Security Manager Protocol (SMP) handles secure connections (with authentication and encryption), and the Attribute Protocol (ATT) defines how to expose and access data as attributes. The Generic Attribute Profile (GATT) [2] builds on the Attribute Protocol to define how to discover services and their characteristics and how to read and write their values. The upper layer of the Host block is the Generic Access Profile (GAP), which defines how devices can discover other devices and connect, pair, and bond to them. The host communicates with the controller using its part of the host controller interface, and applications communicate with the host depending on the APIs exposed by the operating system.
Application
This layer builds on top of the Generic Attribute Profile to implement application-specific characteristics, services, and profiles. A characteristic defines a specific type of data, such as an Alert Level. A service defines a set of characteristics and their behaviors, such as the Link Loss Service. A profile is a specification that describes how two or more devices with one or more services communicate with each other. An example is the Proximity profile, which has two roles: Proximity Monitor and Proximity Reporter.
The three blocks don't have to run on the same processor. In fact, there are three common configurations --- one single-chip and two dual-chip:
Single-chip (SoC)
Controller, host and application code run on the same chip. The host and controller communicate through function calls and queues in the chip's RAM. Most simple devices such as BLE sensors use this configuration; it keeps the cost down. Some smartphones also use this configuration if they have a SoC with Bluetooth built in.
Dual-chip over HCI
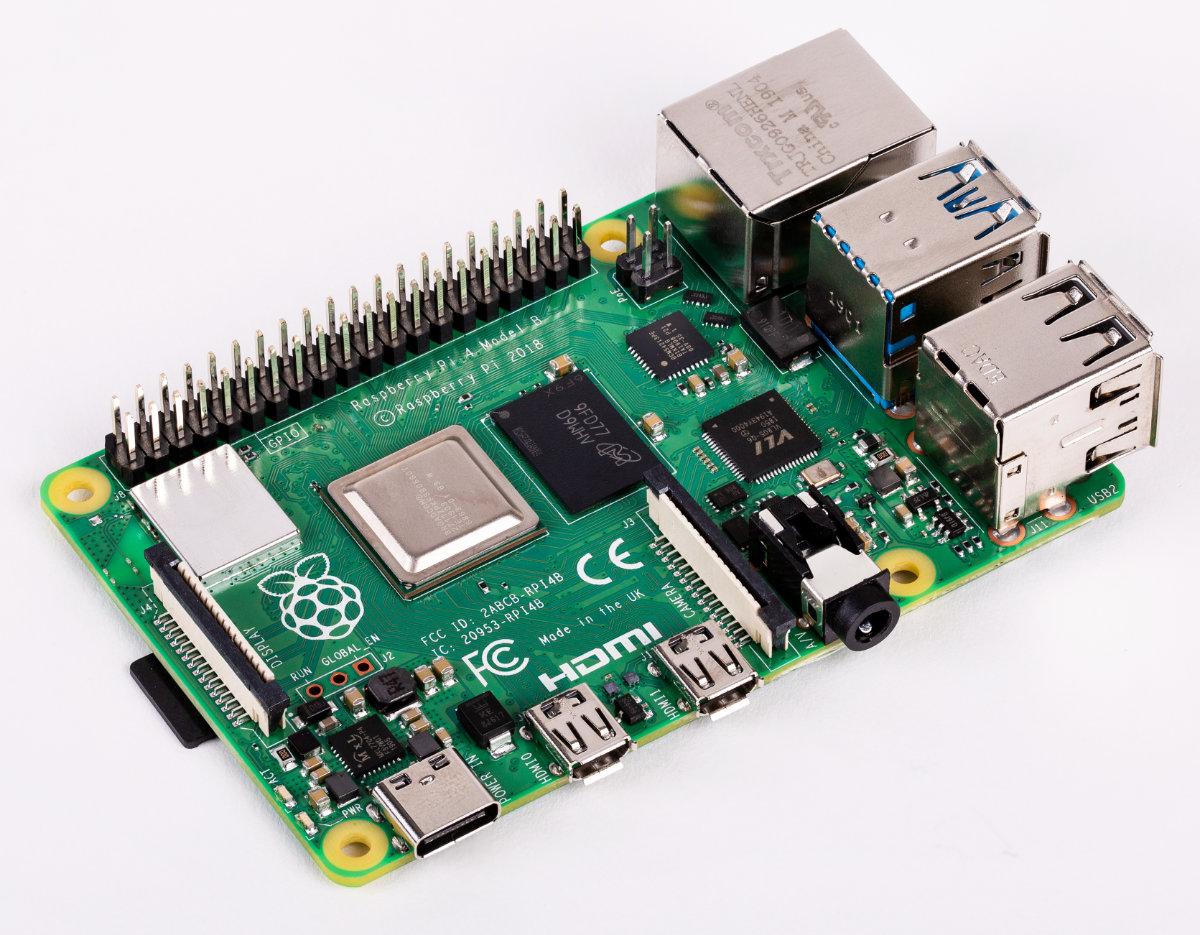
A dual-chip solution with application and host on one chip, and the controller on another chip, communicates over HCI. Because HCI is a standardized interface, it lets you combine different platforms. For instance, on a Raspberry Pi, the Wi-Fi and BLE chip implements a BLE controller. If you connect a BLE dongle to an older Raspberry Pi, this dongle also implements a BLE controller. [3] BlueZ, the Raspberry Pi Linux kernel's Bluetooth stack, implements a BLE host. So BlueZ communicates with the BLE controller in the built-in BLE chip or the BLE dongle. In the former case, the HCI uses SDIO, and in the latter, UART over USB. [4] Many smartphones and tablets also use the dual-chip over HCI configuration, with a powerful processor running the host and a Bluetooth chip running the controller.
Dual-chip with connectivity device
Another dual-chip solution is one with the application running on one chip and the host and controller on another chip. The latter is then called the connectivity device because it adds BLE connectivity to the other device. This approach is useful if you have an existing hardware device that you want to extend with BLE connectivity. Because there's no standardized interface in this case, the communication between the application processor and the connectivity device needs to make use of a proprietary protocol implemented by the connectivity device.
A three-chip solution with controller, host, and application each running on its own chip is also possible. However, because of the associated cost, this is typically only done for development systems.
How to communicate with BLE devices?
Bluetooth Low Energy has two ways to communicate between devices: with and without a connection.
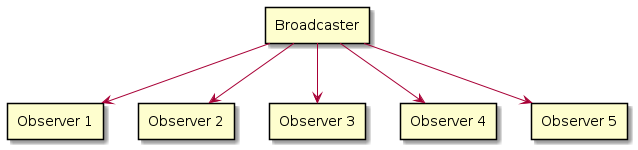
Without a connection
Without a connection means that the device just broadcasts information in an advertisement. Every BLE device in the neighborhood is able to receive this information.
Some examples of BLE devices broadcasting data are:
Proximity beacons
These devices, often following Apple's iBeacon standard, broadcast their ID. Receivers calculate their approximate distance to the beacons based on the advertisement's Received Signal Strength Indicator (RSSI).
Sensors
Many temperature and humidity sensors broadcast their sensor values. Most devices do this in an unencrypted fashion, but some of them encrypt the data to prevent it being read by every device in the neighborhood.
Mobile phones
After the COVID-19 pandemic started in 2020, Google and Apple collaborated on the Exposure Notifications standard for contact tracing. As part of this technology, Android phones and iPhones broadcast unique (but anonymous) numbers. Other phones can pick up these numbers and use them later to warn users that they have been in contact with someone who is known to have had COVID-19.
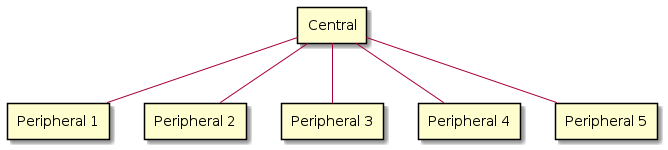
With a connection
The other way to communicate between BLE devices is with a connection. One device (the client) scans for BLE advertisements to find the device it wants to connect to. Then, optionally, it may do an active scan to ask the device (the server) which services are offered.
After the client connects to the server, the client can use the server's services. Each BLE service is a container of specific data from the server. You can read this data, or (with some services) write a value to the server.
Some examples of BLE devices using a connection are:
Fitness trackers
Your smartphone can connect to a fitness tracker and read your heart rate, the tracker's battery level, and other measurements.
Sensors
Some environmental sensors let you read their sensor values over a BLE connection.
Proximity reporters
These devices sound an alert when their connection to another device is lost.
Advantages of BLE
Low power consumption
As its name implies, Bluetooth Low Energy is optimized for low-power applications. Its whole architecture is designed to reduce power consumption. For instance, setting up a connection, reading or writing data, and disconnecting happens in a couple of milliseconds. The radio is often the most energy-consuming part of a device. Therefore, the idea is to turn on the Bluetooth radio, create a connection, read or write data, disconnect, and turn off the radio again until the next time the device has to communicate.
This way, a well-designed BLE temperature sensor is able to work on a coin cell for ten years or more. You can use the same approach with other wireless technologies, such as Wi-Fi, but they require more power and more time to set up a connection.
Ubiquitous
BLE radio chips are ubiquitous. You can find them in smartphones, tablets, and laptops. This means that all those devices can talk to your BLE sensors or lightbulbs. Most manufacturers create mobile apps to control their BLE devices.
You can also find BLE radios in many single-board computers, such as the Raspberry Pi, and in popular microcontroller platforms such as the ESP32. [5] This makes it quite easy for you to create your own gateways for BLE devices. And, platforms such as the Nordic Semiconductor nRF5 series of microcontrollers with BLE radio even make it possible to create your own battery-powered BLE devices.
Low cost
There's no cost to access the official BLE specifications. Moreover, BLE chips are cheap, and the available development boards (based on an nRF5 or ESP32) and Raspberry Pis are quite affordable. This means you can just start with BLE programming at minimal cost.
Disadvantages of BLE
Short range
BLE has a short range (for most devices, less than 10 meters) compared to other wireless networks, such as Zigbee, Z-Wave, and Thread. It's not a coincidence that these competitors all have a mesh architecture, in which devices can forward their neighbors' messages in order to improve range. Low-power wide area networks (LPWANs), such as LoRaWAN, Sigfox, and NB-IoT, have even longer ranges.
In 2017, the Bluetooth SIG added Bluetooth Mesh, a mesh protocol. This builds upon BLE's physical and link layers with a whole new stack above them. However, Bluetooth Mesh isn't as well-established as the core BLE protocol, at least not for home use.
Limited speed
The BLE radio has a limited transmission speed. For Bluetooth 4.2 and earlier, this is 1 Mbps, while for Bluetooth 5 and later, this can be up to 2 Mbps. This makes BLE unsuitable for high-bandwidth applications.
You need a gateway
Wi-Fi devices have their own IP addresses, so you can communicate with them directly from other IP-based devices, and they're integrated in your LAN (local area network). Bluetooth doesn't have this: to integrate your BLE devices with other network devices, you need a gateway. This device has to translate Bluetooth packets to IP-based protocols such as MQTT (Message Queuing Telemetry Transport). That's why many BLE device manufacturers have smartphone apps that function as device gateways. [6]
Platforms used in this book
This book focuses on Bluetooth Low Energy programming on three platforms:
These choices were made in order to demonstrate a wide range of applications compatible with many software and hardware platforms.
Python/Bleak (Raspberry Pi, PC)
Python is an easy-to-use programming language that works on all major operating systems. There are a lot of Python Bluetooth Low Energy libraries, but many of them support only a single operating system. Bleak, which stands for Bluetooth Low Energy platform Agnostic Klient, is a welcome exception. It supports:
Windows 10, version 16299 (Fall Creators Update) or higher
Linux distributions with BlueZ 5.43 or higher (also on a Raspberry Pi)
OS X 10.11 (El Capitan) or macOS 10.12+
Bleak is a GATT client: it's able to connect to BLE devices that act as GATT servers. It supports reading, writing, and getting notifications from GATT servers, and it's also able to discover BLE devices and read advertising data broadcast by them.
Bleak doesn't implement a GATT server. In practice this isn't a big limitation. GATT servers are typically implemented on constrained devices, so, for this purpose, the ESP32 and nRF52 hardware platforms are a better match. [8]
C++/NimBLE-Arduino (ESP32)
If you're looking at microcontrollers, the Arduino framework has become quite popular, not only for the original Arduino boards, which didn't have BLE functionality, but also on ESP32 development boards, which do.
Programming for the Arduino framework is done in a variant of C++, but the framework and many Arduino libraries hide much of C++'s complexity. Even if you only know some C (which is much less complex than C++), you'll be able to use the Arduino framework.
One of the more popular BLE libraries for Arduino on the ESP32 is NimBLE-Arduino. It's a fork of NimBLE, which is part of the Apache Mynewt real-time operating system. With NimBLE-Arduino, you can easily create your own GATT server or client.
C/Zephyr (nRF52)
For even more constrained devices, typically battery-powered, you need a specialized real-time operating system (RTOS). This book uses the Zephyr Project on nRF52840-based devices from Nordic Semiconductor. Zephyr has a completely open-source Bluetooth Low Energy stack.
Zephyr's BLE stack is highly configurable. You can build Zephyr firmware for three configuration types:
Combined build
Builds the BLE controller, BLE host, and your application for a one-chip configuration.
Host build
Builds the BLE host and your application, along with an HCI driver to let your device communicate with an external BLE controller on another chip. [9]
Controller build
Builds the BLE controller with an HCI driver to let your device communicate with an external BLE host on another chip.
With some basic knowledge of C, you can create your own BLE devices with Zephyr, such as BLE beacons, sensor boards, and proximity reporters. Zephyr has extensive documentation of its Bluetooth API, as well as a lot of ready-to-use examples that you can build upon.
Recommended hardware
You need some (affordable) hardware for the examples in this book:
The Python examples are hardware-agnostic due to the use of Bleak. So, whether you want to use a Raspberry Pi or another Linux computer, a Windows computer, or a Mac, it won't make much difference.
For the NimBLE-Arduino examples, any ESP32 development board will suffice. [10]
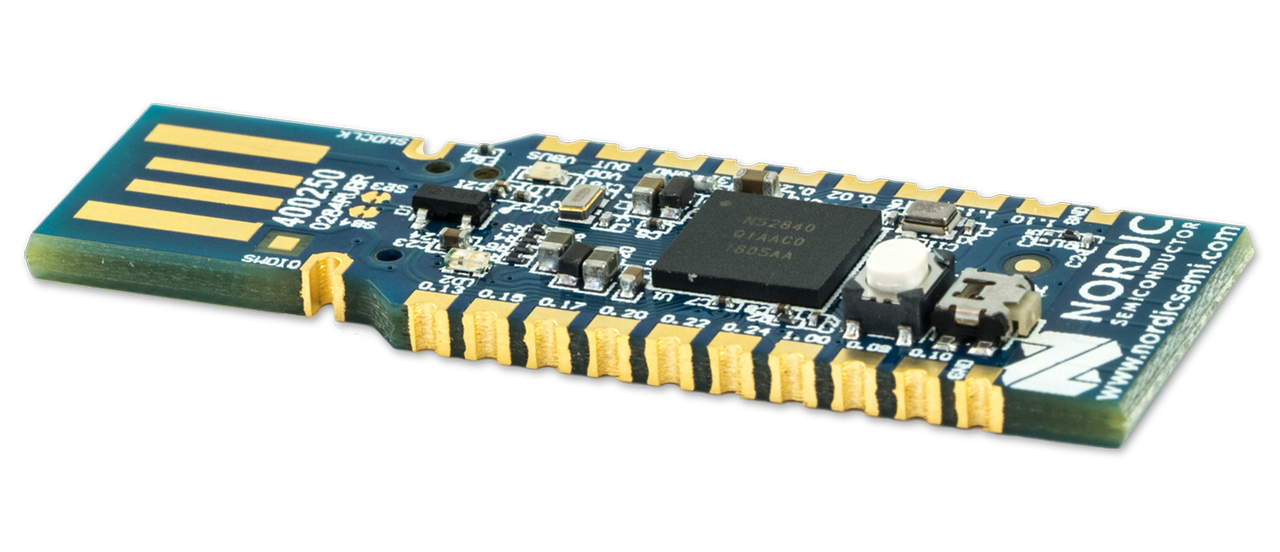
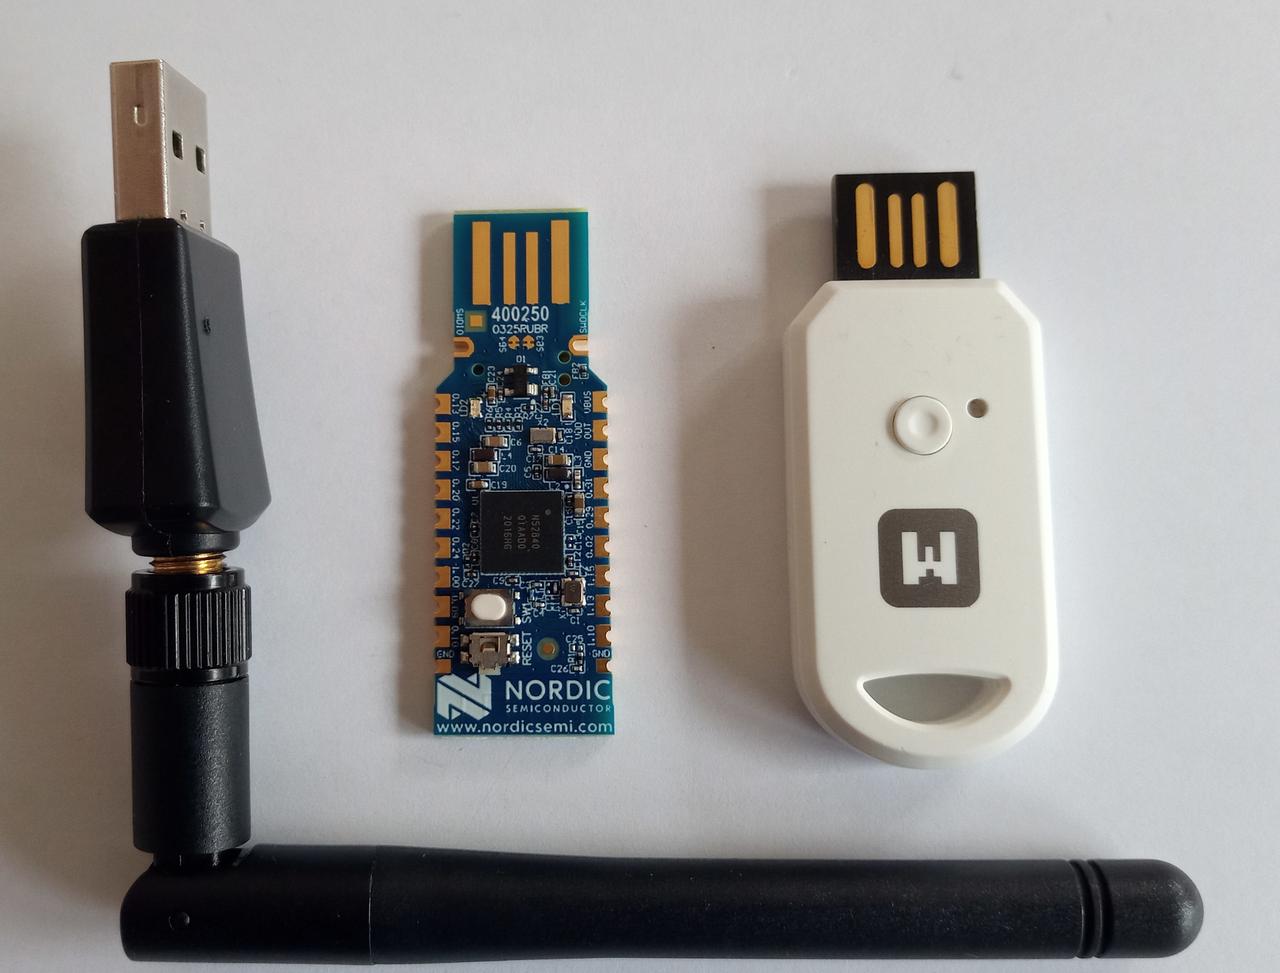
For the Zephyr examples, I recommend a Nordic Semiconductor nRF52840 Dongle, but you can use any BLE microcontroller supported by Zephyr. Some other manufacturers have variants of the dongle, such as the April USB Dongle 52840 (with an external antenna) or the nRF52840 MDK USB Dongle from makerdiary (with a case).
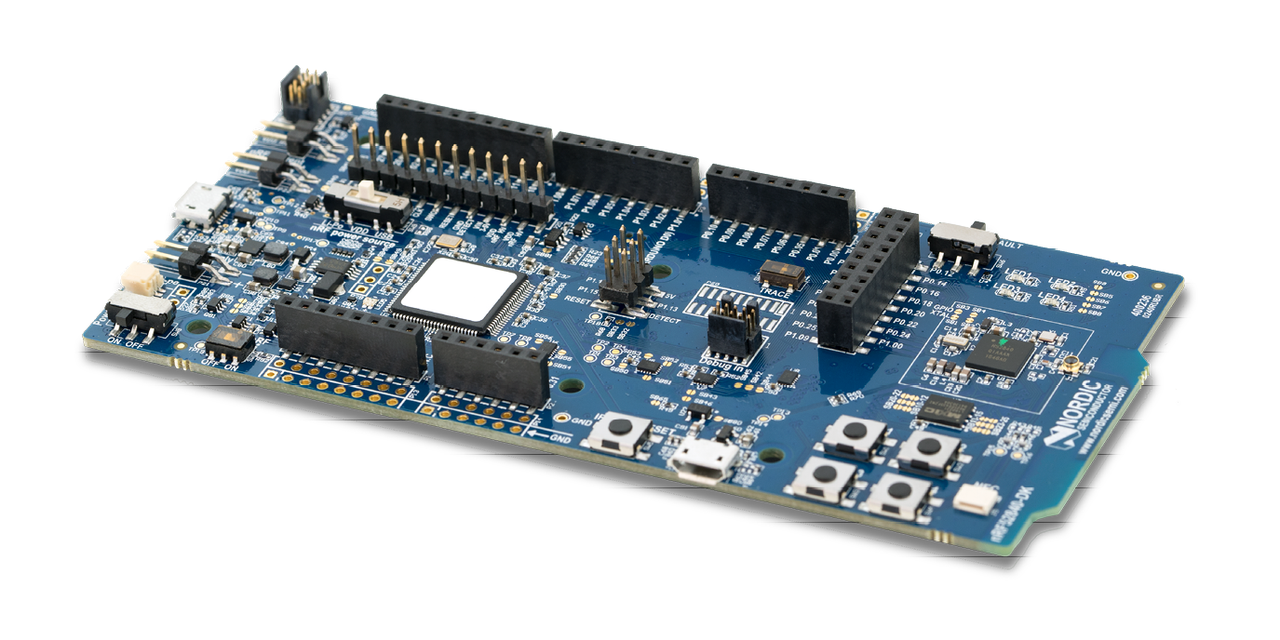
If you're really serious about BLE development with Zephyr, I also recommend Nordic Semiconductor's nRF52840 Development Kit. This is the bigger (and slightly less affordable) brother of the nRF52840 Dongle, offering more capabilities to debug your code easily. If you have one of these, you can do your initial development on it, and move your code to the nRF52840 Dongle when you've solved the most complex issues.
So, at the minimum, you need your computer, one ESP32 development board and one BLE microcontroller supported by Zephyr.
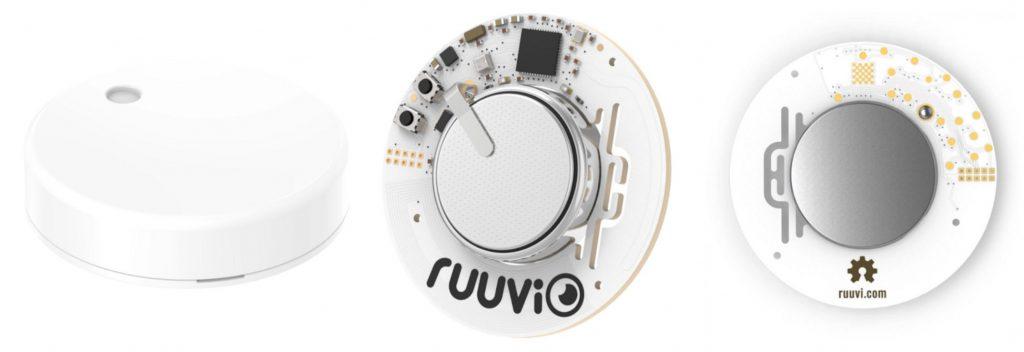
One of my favourite Bluetooth Low Energy devices is the RuuviTag. It's a sleek environmental sensor measuring temperature, air humidity, air pressure and motion, broadcasting their values every second as BLE advertisements. Its firmware, hardware schematics and mobile apps for Android and iOS are all open source. And the company Ruuvi offers extensive developer documentation.
I'm also a fan of the MQTT protocol for IoT messaging. While writing my book Control Your Home with Raspberry Pi, which is all about creating a home automation gateway for Bluetooth Low Energy, Zigbee, Z-Wave and other protocols, I contributed support for the RuuviTag to bt-mqtt-gateway, a BLE to MQTT gateway I covered in the book.
Recently I have been writing a new book, about Bluetooth Low Energy programming, and as part of this endeavour I contributed support for the RuuviTag to Theengs Decoder, an efficient, portable and lightweight C++ library for BLE payload decoding. The RuuviTag RAWv1 and RAWv2 decoders have been added in Theengs Decoder v0.1.7. As Theengs Decoder is now used in OpenMQTTGateway, a gateway for various wireless protocols that you can install on an ESP32 or other devices, this means that OpenMQTTGateway v0.9.10 also detects RuuviTag advertisements.
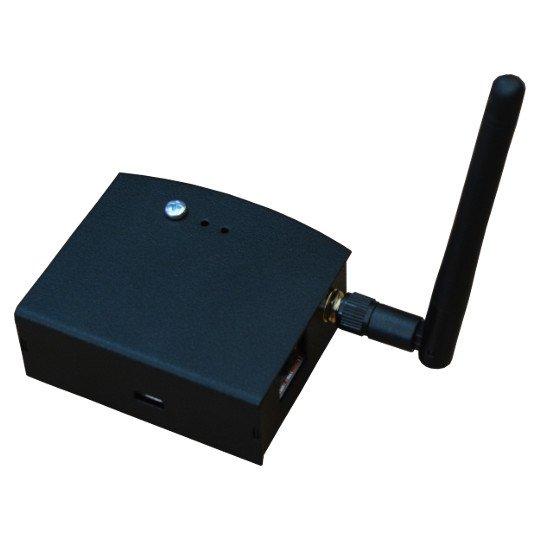
To give an example, my Olimex ESP32-Gateway[1] running OpenMQTTGateway v0.9.10 detects my RuuviTag running the RAWv1 firmware and converts its BLE advertisements to the following JSON payload on MQTT: [2]
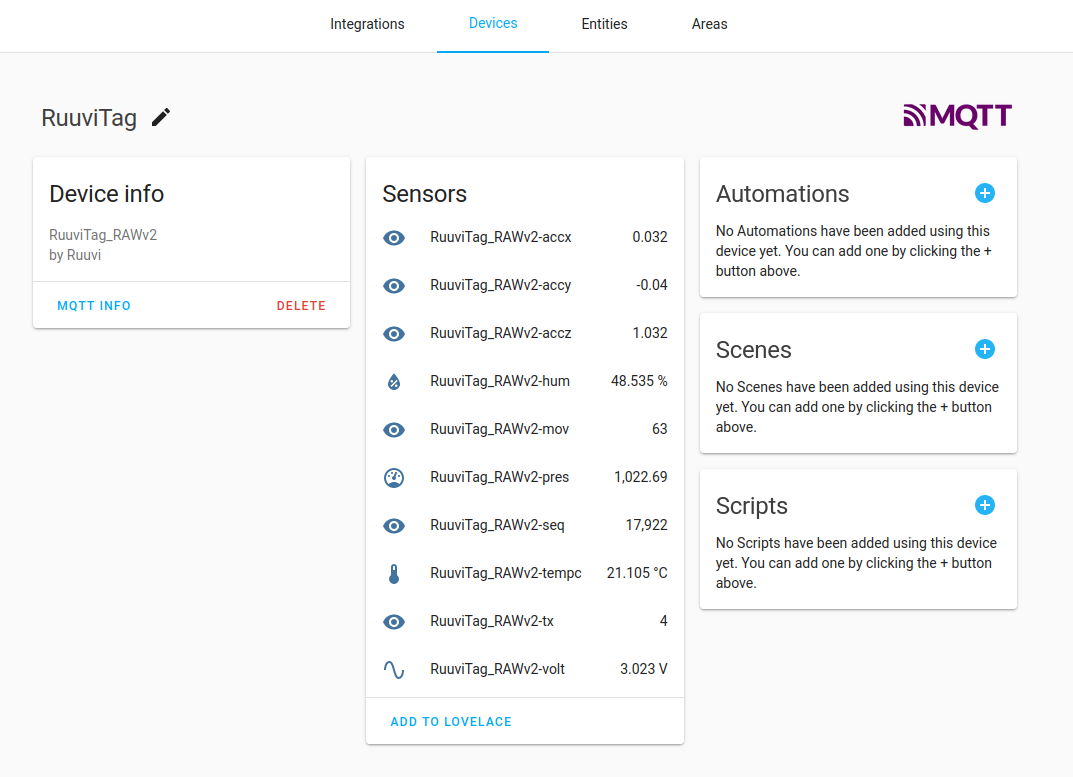
This is quite a straightforward format to further process these measurements in an MQTT-centric home automation system. And because Home Assistant discovery is enabled by default in OpenMQTTGateway, your RuuviTags are automatically detected in Home Assistant if you have added the MQTT integration: