The M5Stack Core is a modular, stackable, ESP32 board with a 2 inch LCD screen and three buttons, all in a package that doesn't look bad in your living room. ESPHome is a system to configure your ESP8266/ESP32 with YAML files to connect them to your home automation system (MQTT or Home Assistant). As of ESPHome 1.16.0, released this week, ESPHome supports the M5Stack Core's ILI9341 display.
What this means is that you can now set up your own display device without having to solder (thanks to the M5Stack Core's all-in-one package) and without having to program (thanks to ESPHome's configuration-based approach), and let it talk to your home automation system, including advanced functionality such as over-the-air (OTA) updates. This is really bringing do-it-yourself home automation to the masses.
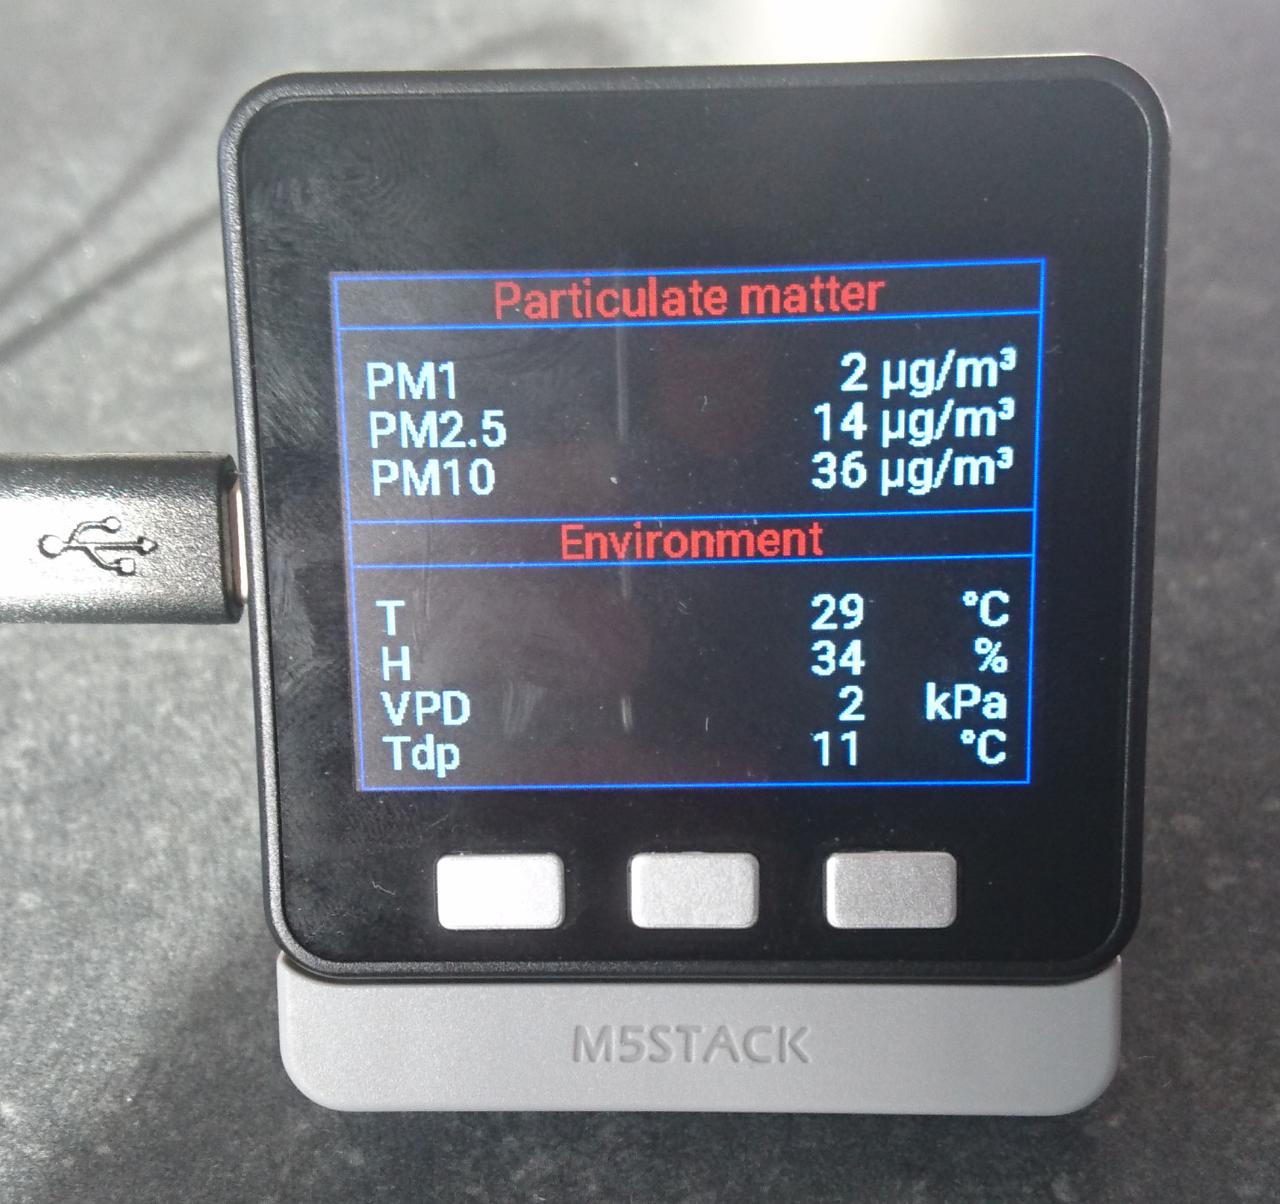
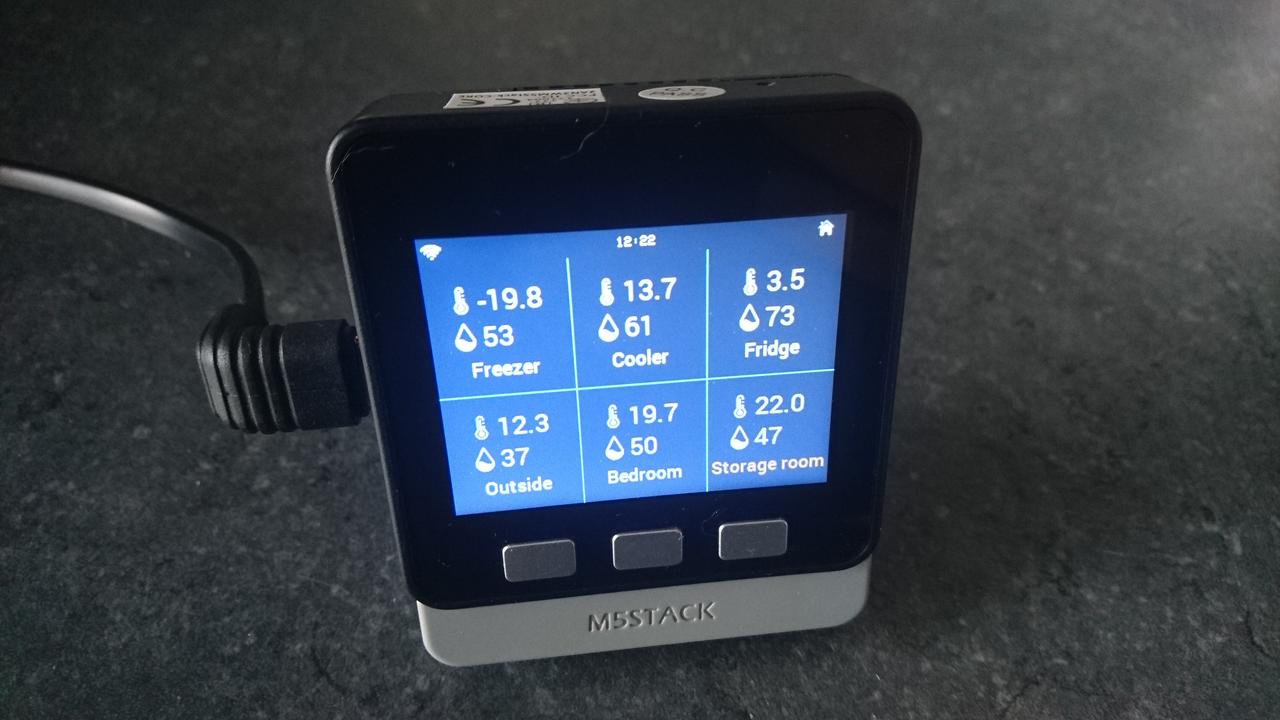
For an example, have a look at my ESPHome configuration for the M5Stack PM2.5 Air Quality Kit. I wrote it two months ago for the dev version of ESPHome, and I can confirm that this now just works with the 1.16.0 release. The result looks like this:
Using the display
The display is using the SPI bus, so you define it like this with the right clock, MOSI and MISO pins:
# Download Roboto font from https://fonts.google.com/specimen/Robotofont:-file:"fonts/Roboto-Medium.ttf"id:font_roboto_medium22size:22glyphs:'!"%()+,-_.:°0123456789ABCDEFGHIJKLMNOPQRSTUVWXYZabcdefghijklmnopqrstuvwxyz/³µ'
Then you can define the display and add a lambda expression to show something on the screen:
The M5Stack Core's buttons were already supported: they can just be used as a binary sensor. For instance, this is how you use the middle button to toggle the display's backlight:
# Button to toggle the display backlightbinary_sensor:-platform:gpioid:M5_BtnBpin:number:38inverted:trueon_click:then:-switch.toggle:backlight# GPIO pin of the display backlightswitch:-platform:gpiopin:32name:"Backlight"id:backlightrestore_mode:ALWAYS_ON
The M5Stack Core has three buttons. From left to right those are button A (GPIO39), button B (GPIO38) and button C (GPIO37). You can use them all like in the code above. As an exercise, I have reimplemented Homepoint's interface in ESPHome. With the left and right buttons I cycle through the pages showing sensor values of my home, and with the middle button I toggle the display backlight.
As a technology writer and a fulltime nerd I like to tinker with everything, including all my hardware. I like to study it, program it, change it, let it do things that the manufacturer even hasn't thought about. I want to be in control.
Many of the articles and books that I write have this practical approach. And when I review hardware for a magazine and I find that the hardware has a cloud-based and a local mode, I turn my attention to the latter, because I don't have any interest in the former and almost all other reviewers will rave about the cloud-based mode anyway.
It won't surprise you that I love hackable hardware. Not hackable in the sense that it's insecure, but hackable in the sense that I can tinker with it. [1] In principle all devices are hackable, they just differ in the proficiency you need to do it. But this year I decided to put my money where my mouth is and buy some devices that are more or less expressly designed to tinker with. This way I want to support these companies, and of course it makes tinkering with these devices much easier for me, as I'm not an elite hardware hacker.
These are four hackable devices that I have bought in 2020 and that I really like:
NumWorks, a scientific calculator with MicroPython
As a math geek, I made do with the bc command or an interactive Python session on my computer when I needed to compute something, but it always felt a bit like... a hack? So I wanted a dedicated scientific calculator. I didn't find the one I had to buy when I was an engineering student, and I'm actually happy that I haven't found it, because I remember this device was quite kludgy.
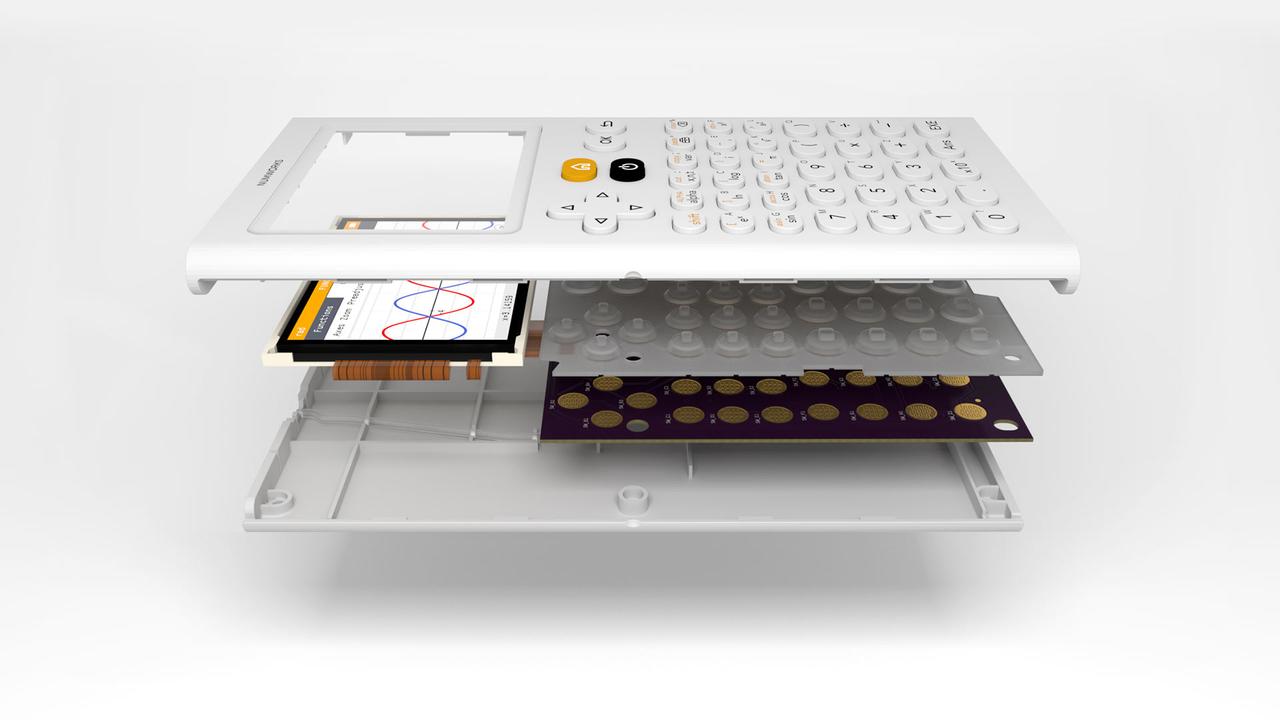
Enter the NumWorks: at first sight it looks like the hipster's version of a graphical calculator, but the internals are as cool as its design. Both the hardware design and the software are available under a Creative Commons license. The 3D models of the case, the source code of the firmware, even the electronic schematics of the printed circuit board, you'll find it all on the company's Engineering page.
I have used the NumWorks a lot in the last few months and it's a dream to work with. Contrary to many hackable devices, it just works. It's slim and light, it has an amazing battery life, it instantly turns on and off, you can recharge it from a standard USB port and you can upgrade its firmware from your browser (for now sadly only Chromium/Chrome) thanks to WebUSB. It has all the basic computing and graphing functionality I need, and you can even run your own MicroPython scripts.
Another really cool feature is the online simulator of the NumWorks. This is a fully working version of the firmware that you can try in your web browser to explore the calculator's functionality. I hope more companies will offer something like this so you can try their device before you buy it.
PinePhone, a Linux phone designed for hackers
I have never liked the dumbed-down, closed walled gardens of Android and iOS with their ecosystem of apps that spy on you, yell at you with ads, force you to use their cloud service, and artificially limit what you can do with your phone. When you're running Linux on your desktop/laptop as I do, the contrast with the mature, privacy-friendly and open ecosystem of Linux is just unbelievable.
When I had to choose between Android and iOS for my first smartphone, the former seemed the lesser evil, so that's what I still use on my phone. But naturally I wanted to have a hackable phone with an operating system that treats me like an adult, and PINE64's PinePhone is the ultimate hackable phone. PINE64 has published as much information as possible to hack on the device, such as electronic schematics and data sheets.
You can run many Linux distributions on the PinePhone, and you have full control over your phone in a familiar Linux environment. Moreover, you have access to the vast ecosystem of open source programs that you're used to on the desktop.
That said, I don't consider the PinePhone ready as a daily phone. The hardware specifications are meager, the software is still buggy and many programs still have to be adapted to the mobile form factor. I'm using the PinePhone mainly as a development system to explore the mobile Linux ecosystem. [2]
But I like the vibe of the community of hackers that has originated around the PinePhone. And the device is really designed for hackers. There are six pogo pins on the back that expose an interrupt line, power input to charge the battery, a power source and an I²C interface. PINE64 has already announced a battery extension backcover and a keyboard backcover that make use of these pogo pins, but you're free to connect anything you want. There's a breakout board for easier access to the pins, and Martijn Braam even connected a thermal camera to the backcover of his PinePhone.
Kobol Helios64, a five-bay NAS with built-in battery
Linux is no stranger to NAS devices as an operating system, but most of them are locked down. Of course you can install a Linux-based or FreeBSD-based operating system on a server to function as a NAS [3], but just as for my other devices I wanted to have a NAS that was expressly designed for running your own Linux distribution and being hacked on.
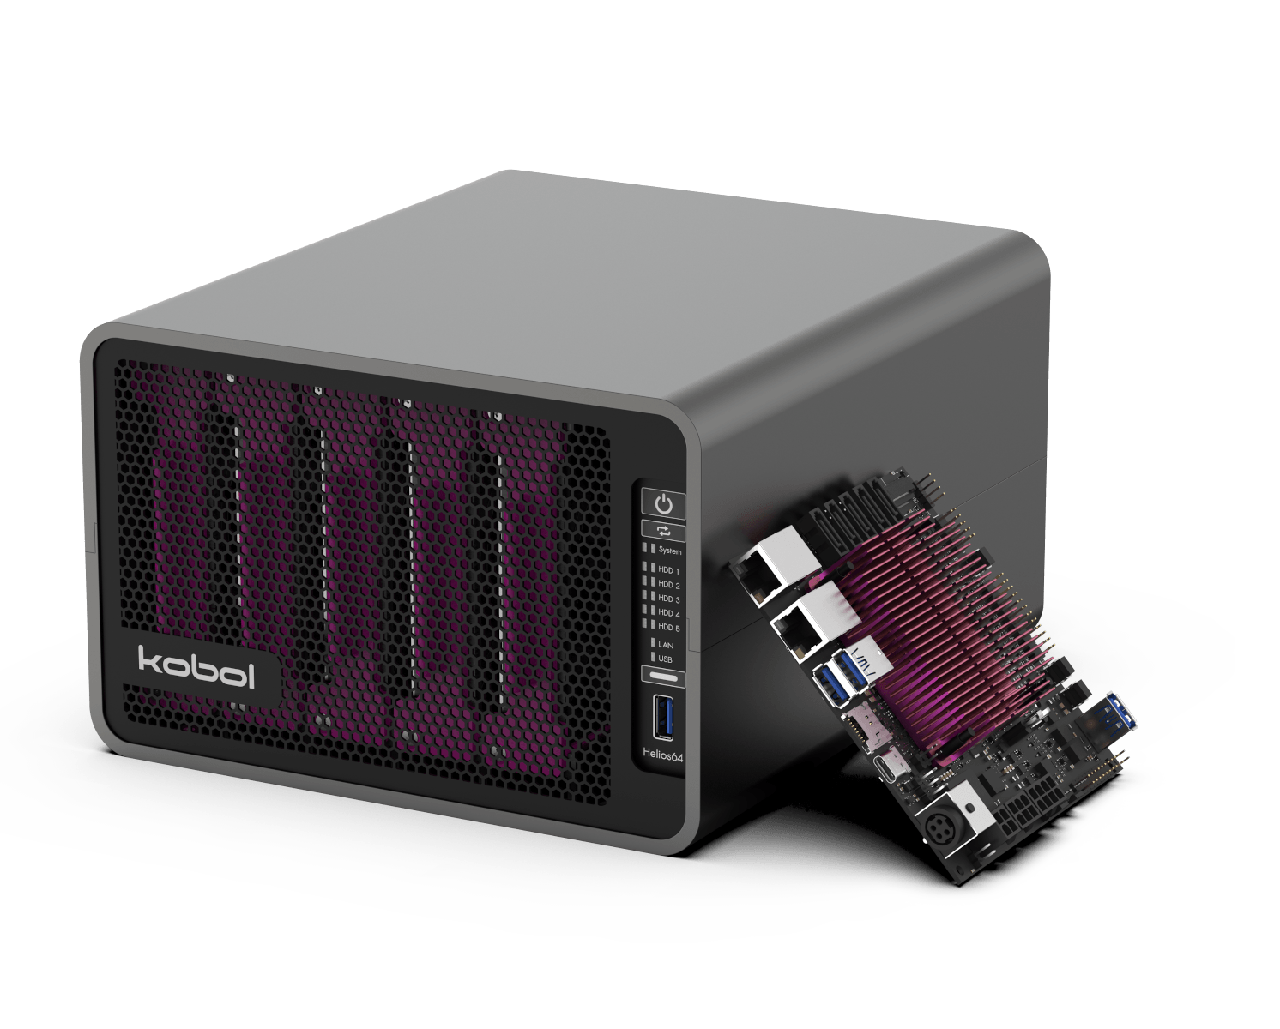
That's how I discovered Kobol's Helios64. It's a quite well-looking five-bay NAS, powered by a 64-bit ARM Rockchip RK3399 SoC with 4 GB RAM, 16 GB eMMC for storage, dual Ethernet and a built-in battery.
The Helios64 comes as a DIY kit: you have to assemble it yourself, which took me two hours earlier this week. The advantage is that you learn a lot about the internals of your NAS while assembling it, which could come in handy when you start hacking on it.
Kobol's wiki has extensive documentation about the hardware, including electronic schematics and data sheets. The NAS has rich expansion possibilities through I²C, SPI, GPIO, ... for instance if you want to add a custom control panel or OLED display. Unfortunately the Kobol team has made a mistake in their Ethernet wiring, so the 2.5 Gbps Ethernet interface can not be connected to a Gigabit Ethernet switch without sacrificing performance, but they fully explain the fix and even suggest a hardware fix you can apply yourself.
Armbian has support for the Helios64, both in the Debian Buster and Ubuntu Focal variants. Not all hardware features are supported yet (for instance there are some issues with the USB Type C port in the driver), but I'm looking forward to testing the Helios64 with Armbian as a NAS.
reMarkable 2, a paper tablet with an awesome community
The reMarkable 2 is really what it says: remarkable. The company calls it a "paper tablet", I would call it an e-reader. I bought it mainly because I wanted to read PDF reports and data sheets, which I don't like to read on a computer screen and I don't want to print them either. I already owned a 6" Kobo e-reader, but I haven't used it in the last few years because it was too slow, too small and just too cumbersome.
The reMarkable 2 is everything you would want from an e-reader: a sharp 10.3 inch e-paper display, thin, light, fast and beautiful to the eye. You can also take notes directly on PDF files, which I have been using quite a lot in the week that I own the device now. And many people are even using their reMarkable 2 for drawing.
The company expects you to use their reMarkable cloud, which offers synchronization of your documents and notes and adds conversion of your handwriting to text. However, I want to self-host as much as possible, so before I bought the device I made sure that I could do without the cloud.
And yes you can. The reMarkable 2 is running a proprietary Linux system, Codex, but the company doesn't restrict you in any way. You have root access and you can run your own software on it. There's a wiki with many hacking tips, and the reHackable community on GitHub offers custom software and the Awesome reMarkable list of third-party software.
There's also a community-maintained repository of free software for the reMarkable, toltec, which works on top of the opkg package manager and the Entware distribution, and one of the projects that I'm definitely going to try is rmfakecloud, which fakes the cloud synchronization protocol of reMarkable so you can run this on your own server. The stock firmware of the reMarkable 2 has only quite basic functionality compared to some competitors, but I'm quite confident the open source community will expand the possibilities.
The reMarkable 2 also has pogo pins, and someone even used these to attach a foot pedal so he could move forward and back through sheet music while playing his instrument. So while not open source, the reMarkable 2 is quite hackable and I expect I will enjoy it a lot.
I have a couple of ESP32 devices around the house that extract sensor measurements from MQTT messages and show them on a display. On these microcontroller-based devices I like to simplify [1] the parsing, so I prefer MQTT messages with just a number as the payload.
In the past The Things Network not only published the full JSON payload, but also published the values from the payload fields to individual MQTT topics [AppID]/devices/[DevID]/up/[Field]. This made it much easier to read the values. However, at the end of 2019 The Things Network disabled uplink fields on MQTT for performance reasons.
But if you're bridging The Things Network to your own local MQTT broker, you can parse the JSON payload and republish the payload fields as separate MQTT messages yourself.
Mqttwarn to the rescue
It turns out that this is quite easy to do with mqttwarn, which I was already running as a notification system for my MQTT-based home automation system. It's a bit of a hack, but it works well.
In your mqttwarn.ini, define the following topic section:
This supposes that all incoming messages from the Things Network are translated by your MQTT bridge to subtopics of ttn, and that you have a log service defined and enabled in the launch line.
Now in your funcs.py, define the the_things_network_uplink_fields() function:
defthe_things_network_uplink_fields(data,srv=None):"""Extract application ID, device ID and uplink fields from JSON payload of The Things Network messages on topic ttn/+/devices/+/up and publish the uplink fields on separate MQTT topics ttn/+/devices/+/up/[Field]."""iftype(data)==dictand"app_id"indataand"dev_id"indataand"payload_fields"indata:app_id=data["app_id"]dev_id=data["dev_id"]base_topic="/".join(["ttn",app_id,"devices",dev_id,"up"])iftype(data["payload_fields"])==dictandsrvisnotNone:forfield,valueindata["payload_fields"].items():srv.mqttc.publish("/".join([base_topic,field]),value,qos=0,retain=False)return"Published uplink fields of "+base_topicreturnNone
So what's happening here? If mqttwarn receives a ttn/+/devices/+/up topic, it logs this. To define the log message, it calls the function defined in the format line. This functions has access to the data from the MQTT message as a dict. So in this function I decode the app ID and device ID, extract all uplink fields from the payload_fields dict and then for every field publish the corresponding value to the MQTT topic consisting of the original topic with the field's name as a subtopic.
The result? Not only do I get the JSON payload of above on ttn/APPID/devices/DEVID/up, but a mosquitto_sub -t'ttn/#'-v also gives the following messages:
I can now easily let my ESP32 code subscribe to the previous MQTT topics to get the sensor measurements directly without having to parse a JSON payload.
The function the_things_network_uplink_fields is general enough that it works for all The Things Network payloads. So you don't need to add anything if you add new devices to The Things Network. [2]
Stop oversharing messages in the bridge
I also changed one thing in the original bridge configuration in mosquitto.conf from my previous blog post. Instead of configuring two-way sharing of messages (topic # both 0 ttn/ APPID/devices/), I made sure to only share the uplink and events messages from The Things Network to Mosquitto and only the downlink messages from Mosquitto to The Things Network:
I don't think the MQTT messages published by mqttwarn would result in a loop, but better safe than sorry: there's no need for Mosquitto to forward the payload field messages to The Things Network.
The Things Network is an interesting global open LoRaWAN network. I have a LoRaWAN gateway running at home, The Things Indoor Gateway, and some LoRaWAN temperature and humidity sensors in the garden and the garden shed. The sensors wirelessly send a measurement every 20 minutes, and the gateway picks it up and forwards it to the network server of The Things Network.
The Things Network can be integrated with many other platforms to process these sensor measurements. For instance, there's a thethingsnetwork integration in Home Assistant and a (deprecated) node-red-contrib-ttn node in Node-RED. Even more interesting is the MQTT API, which perfectly fits in my MQTT-based home automation system. [1]
For instance, you can easily subscribe to your sensor measurements with mosquitto_sub:
In The Things Network Console, navigate to the application you'd like to subscribe to. Here you can find the Application ID (APPID) and an Access Key (APPKEY) needed to authenticate over MQTT. Under Handler you find the region the application is registered to. You will need the part that follows ttn-handler-. For instance, if it's eu, connect to eu.thethings.network.
Of course you're doing this over TLS, so you need to download The Things Network's PEM-encoded CA certificate mqtt-ca.pem.
After a while, a JSON payload such as the following one should appear on the topic APPID/devices/DEVID/up:
The sensor's measurement values (battery voltage, the internal sensor's humidity and temperature, and the temperature of an externally connected DS18B20) are in the payload_fields object.
Configuring a bridge
However, I already have an MQTT broker running at home, Eclipse Mosquitto, and all my home automation devices are using it. Having to use a second MQTT broker on some of these devices would be cumbersome. Luckily, that's not necessary, as Mosquitto has a quite powerful feature, a bridge. It basically means that you connect two brokers so messages to one broker are forwarded to the other one and/or the other way around.
To bridge your local Mosquitto server to The Things Network's MQTT broker, add the following section to your mosquitto.conf file:
# Bridge to The Things Networkconnectionbridge
addresseu.thethings.network:8883
remote_usernameAPPID
remote_passwordAPPKEY
bridge_cafile/mosquitto/config/certs/ttn-ca.pem
bridge_insecurefalsetopic# both 0 ttn/ APPID/devices/
Make sure to refer to the correct path of the CA certificate file. The line topic # both 0 ttn/ APPID/devices/ means: your MQTT broker subscribes to the remote topic APPID/devices/# on The Things Network and republishes the received messages to ttn/#. This also works the other way around: if you publish something to a subtopic of ttn/, it will be republished to The Things Network with the prefix APPID/devices/.
Because the bridge goes both ways, this means that uplink messages (sensor measurements from your LoRaWAN devices like the one above) are forwarded to your local MQTT broker and downlink messages (commands) that you send to your local MQTT broker are forwarded to The Things Network and then to your LoRaWAN device.
If you want to subscribe to more than one The Things Network application, that's easy: just add another bridge section with the right application ID, application key and remapping for the topics. If you want a different remapping of the topic trees, have a look at the man page for mosquitto.conf and search for the section Configuring Bridges. The man page is very good and you'll see in this section that there are a lot of options to configure the bridge.
After this configuration change, restart Mosquitto. You can now subscribe to the right topic in your local MQTT broker, and your local MQTT dashboard or other home automation software has access to the devices managed by The Things Network.
E-paper displays are underestimated devices. I love to play with them because they have a unique property in the electronic world: they keep displaying their content even when they're off. This means that they are essential if you want to build low-power devices with an interface.
Think about a device that shows the current temperature. You don't need it to update the temperature on the display continuously: it's OK if this happens once every minute or maybe every five minutes. So you could build a low-power temperature sensor with an e-paper display. Let the device take the sensor measurement, show it on the display, connect to Wi-Fi/Bluetooth/Zigbee/LoRa/... and publish the temperature, and then turn itself off, only waking a minute later to do this all again. Most of the time the device is asleep and thus using negligible power, but there's always something to see on the display.
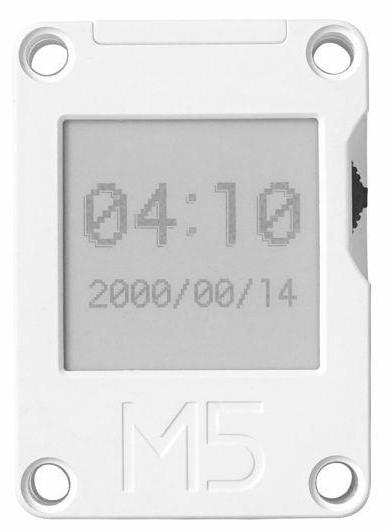
I have played with e-paper displays from Waveshare on an Arduino and on a Raspberry Pi, but earlier this month M5Stack released the Core Ink, which adds a 200x200 1.54" e-paper display to an ESP32-PICO-D4 microcontroller and puts it in a nice little box, even with a built-in magnet so you could attach it to your fridge. It also includes a 390 mAh LiPo battery and expansion ports to attach external sensors and other components, as well as a programmable button. I haven't bought the Core Ink yet, but I could see this used in a home automation setting. You can program it with Arduino, MicroPython or UIFlow (M5Stack's graphical IDE).
E-paper, lots of e-paper
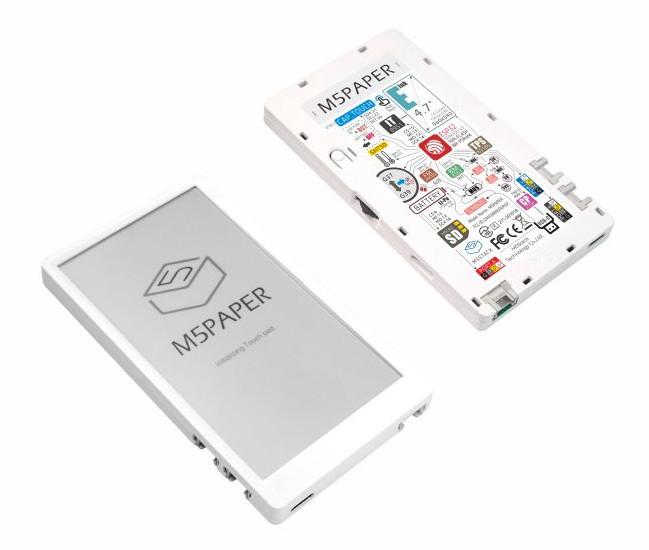
M5Stack has now launched another e-paper device, the M5Paper. It has a much bigger display than the Core Ink: 960x540 4.7" (235 ppi), it can display 16 grayscale levels and it's touch-enabled (supporting multipoint touch and gesture controls). Essentially it's a small e-reader, but fully programmable. And just like its little brother, it has a LiPo battery (1150 mAh), expansion ports and a built-in magnet to attach it to your fridge. The M5Paper also comes with a Sensirion SHT30 temperature and humidity sensor, a microSD card slot and 256 KB EEPROM. The ESP32-D0WD can be programmed with Arduino, MicroPython and UIFlow. The M5Paper is priced $69 in M5Stack's shop. In Europe it's available for around €70.
All in all, judging from the specifications I think the M5Paper would be a nice device to build a dashboard for your home automation system that you could put in your living room or bedroom. Or what about a weather display? It's only a pity that it doesn't have one of those three-color e-paper displays: if it had the red color available, you could use it to display warnings that really stand out from the rest of the icons. The 16 grayscale levels make up for it a bit, but of course it's not the same.
With all this documentation and example code and the nice all-in-one package it comes in, the M5Paper could become one of the most interesting e-paper devices to write your own software for.
Most home automation systems have a web interface that you can use on your computer or smartphone. However, having to open your laptop or unlock your smartphone before navigating to the right web page creates unnecessary friction. What if you quickly want to see the temperature outside or close the blinds?
The solution is a dedicated device that shows a dashboard. Two years ago I bought a M5Stack Core BASIC Kit: a modular, stackable, ESP32 board with a 2 inch LCD screen, all in a package that doesn't look bad in your living room. I wrote an Arduino sketch to turn it into a dashboard for my MQTT-based home automation system: it could read the temperature and humidity of various sensors in my home by subscribing to the corresponding MQTT messages and showing them on the screen.
However, the result was quite basic, and I never really found some time to expand the system to something more usable. Recently I discovered Homepoint: open source firmware for the ESP32 microcontroller that turns your device into an MQTT dashboard, and one of the devices that it supports is the M5Stack Core. [1]
Flashing Homepoint
Just download the latest release of Homepoint, unpack the ZIP file, connect your M5Stack Core to your PC using a USB-C cable and flash the firmware with esptool:
Once you have flashed the device, it starts a wireless access point, so you can visit its web interface and configure the Wi-Fi settings so it connects to your own network. After this, you just put a JSON file with the configuration of your dashboard on its internal storage, and this can be done using a web interface. So no need to reflash it every time you want to change its configuration. It also supports OTA (over-the-air) updates.
You can add sensors, but also switches and lights that you control with the buttons of the M5Stack Core. All in all, it's just what I needed. I now have my M5Stack Core on a shelf in my living room, showing the temperature and humidity outside, of the bedroom and storage room, of the freezer, cooler and fridge:
The first six sensors are all wireless temperature/humidity sensors that transmit their data on the 433.92 MHz frequency band. I use an RTL-SDR stick connected to a Raspberry Pi to receive their transmissions, together with the rtl_433toMQTT project that translates these transmissions to MQTT messages. This uses the rtl_433 project that has more than 150 protocol decoders for various devices.
I have also added an example of another MQTT sensor that shows the temperature and disk usage of one of my Raspberry Pis, collected by the system_sensors project. The last component in the configuration file above is an example of a light switch: it enables me to switch my bathroom light on and off (using ZWave2Mqtt). The setTopic is the MQTT topic to set the value of the light and the getTopic is the MQTT topic to get the value of the light. The values for the on and off states are defined in onValue and ofValue, respectively.
The picture above only shows the six sensors, but with the buttons of the M5Stack Core you can walk through each component until it shows a second screen with the two other components. You can even group components, for instance a group with all devices in a specific room. [2]
The perfect MQTT dashboard
All in all I'm quite happy with Homepoint. When I want to see the temperature of one of the sensors defined in the dashboard, I just have to push on one of the buttons to wake up the screen and I can immediately see all sensors. If you're using an MQTT-based home automation system, an M5Stack Core with Homepoint is the perfect companion.
Recently I bought a new laptop. The first time I was attending a videoconference with this laptop, my network connection (using a USB Gigabit Ethernet adapter) was very flaky and my external microphone turned itself off all the time. It took me a while before I figured out that both issues had the same cause: USB autosuspend.
Apparently both devices had USB autosuspend enabled, so they turned off after a while. I'm not sure why this is, because I used the same devices on my previous laptop with the same operating system (Ubuntu 20.04 LTS) and I never saw this behaviour. Luckily USB autosuspend can be easily disabled for specific devices.
There are multiple ways to do this, for instance with udev rules. However, in my opinion the power management tool tlp offers the easiest way. If you don't have it already, install it:
$ sudoaptinstalltlp
Then have a look at the vendor ID and product ID of the USB devices you don't want to autosuspend:
$ lsusb
Bus 002 Device 002: ID 0bda:8153 Realtek Semiconductor Corp. RTL8153 Gigabit Ethernet AdapterBus 002 Device 001: ID 1d6b:0003 Linux Foundation 3.0 root hubBus 001 Device 002: ID 04f2:b684 Chicony Electronics Co., Ltd Chicony USB2.0 CameraBus 001 Device 006: ID 0556:0001 Asahi Kasei Microsystems Co., Ltd AK5370 I/F A/D ConverterBus 001 Device 003: ID 8087:0029 Intel Corp.Bus 001 Device 001: ID 1d6b:0002 Linux Foundation 2.0 root hub
Here you see the Gigabit Ethernet adapter (with ID 0bda:8153) on the first line, and the microphone (with ID 0556:0001) on the fourth line.
Now create the file /etc/tlp.d/50-usb-autosuspend-blacklist.conf and add both IDs to the USB_BLACKLIST parameter:
USB_BLACKLIST="0bda:8153 0556:0001"
Then restart the tlp service:
$ sudosystemctlrestarttlp
After reconnecting the USB devices, they won't autosuspend anymore and you can happily enjoy your videoconferences again without hardware-related interruptions.
I have been running a home automation system on a Raspberry Pi almost as long as this popular single-board computer family exists. In all those years, the setup has changed a lot: I have replaced the Raspberry Pi 1 by a Raspberry Pi 4, I switched from Domoticz to Home Assistant and more recently to a highly modular setup of home automation services running in Docker containers and communicating by MQTT.
Looking back at my first setup, the seeds were already there for what I now consider the four pillars of a good home automation system:
be secure, so you don't risk someone else controlling your house or spying on you at home;
be modular, to make it easy to plug in other protocols or applications;
only use open source software;
be self-sufficient, not relying on cloud systems from Google, Amazon, or other parties.
Let's look into these one by one.
Secure
Home automation and IoT devices are notoriously insecure. At the Usenix Security Conference 2019, the Czech security software company Avast and Stanford University presented their research of household IoT devices. Avast scanned 83 million IoT devices in 16 million homes around the world of people who agreed to share these data. The results of the study published in "All Things Considered: An Analysis of IoT Devices on Home Networks" were staggering:
7% percent of all IoT devices support an obsolete, insecure, and completely unencrypted protocol such as Telnet or FTP.
Of these, 17% exhibit weak FTP passwords, and 2% have weak Telnet passwords.
Surveillance cameras have the weakest Telnet profile, with more than 10% of them that support Telnet with weak credentials.
3% percent of the homes are externally visible on the internet and more than half of those have a known vulnerability or a weak password.
This is not an isolated study. Not a week goes by without some news items about insecure devices, most of the time because basic security measures such as strong passwords are not enforced by the manufacturer or basic programming errors have been made. To give you an idea about what can happen: in 2018 nude videos of the Dutch women's handball team appeared on a popular porn website because the surveillance cameras of the dressing room of a sauna were broken into. Imagine if someone can access your baby monitor with a camera or your security camera in your living room or bedroom...
So what can you do to secure your home automation system? If you choose an off-the-shelf system: not much. You fully rely on the manufacturer's ability to create a secure system and the goodwill to keep supplying patches that solve security issues that have been discovered. And the home automation and IoT industries have clearly shown they are not up to the task. This is one of the reasons why I prefer open source software. Not because it is always secure, but because the transparency of the open source development process forces developers to create more secure software.
Modular
There are many competing standards and communication protocols for home automation. Unfortunately, many off-the-shelf home automation gateways support only a small subset of these protocols or even use a proprietary protocol that locks you into using devices of the same manufacturer. That severely limits your choice of products.
You can't know which protocols will become popular in a few years, and maybe you like one product that uses Z-Wave and another product that uses Zigbee. It should be easy to interconnect these devices, even when they use different protocols.
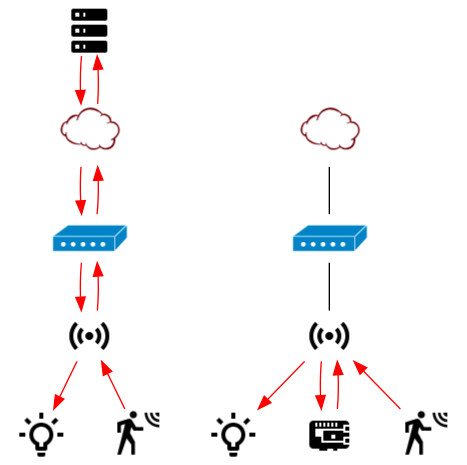
So how can you do this? Many of the wireless communication protocols for home automation need a dedicated transceiver because they work on a specific radio frequency. That's where the Raspberry Pi shines: you can start with a basic Raspberry Pi setup supporting only IoT devices that are communicating over Wi-Fi and Bluetooth, add an RTL-SDR USB dongle to read the measurements of your 433.92 MHz weather sensors, later add a Z-Wave HAT on the board when you start adding Z-Wave sensors to your house and then add a Zigbee
USB transceiver when you want to control some Zigbee lights.
Modularity is also important for software. There's a lot of user-friendly software to make your Raspberry Pi a home automation gateway. So you just install something like Home Assistant, openHAB or Domoticz on your Raspberry Pi and that's it: you have a gateway that supports tons of devices. Some of these systems are very modular and extensible, others aren't. Many of them support MQTT (Message Queuing Telemetry Transport), a common language to exchange messages.
MQTT has become the standard for interoperability between various home automation devices. For instance, if your home automation gateway of choice doesn't support Zigbee but it does support MQTT, then you only have to run the Zigbee2mqtt software, which translates the Zigbee protocol to MQTT messages. Your gateway can then talk to your Zigbee devices using MQTT.
Modularity also means that you don't have to have one gateway. You can perfectly have your main gateway in your basement, but install a second gateway with your 433.92 MHz receiver for your environmental sensors in your living room because that gives you better coverage to receive data from these wireless sensors. If you're using MQTT, that's very simple to implement: you just relay the sensor readings that your gateway in the living room receives to your MQTT broker, after which all the other components of your home automation setup can access the readings in the MQTT format.
In short: a good modular home automation system means that you can mix and match the devices that you like, irrespective of their protocol, and you can use the software and hardware components of your choice, in various locations in your house.
Open source
If you buy an off-the-shelf home automation gateway, you generally don't get access to its source code, so you cannot peek into it to see what it does or to assess its quality. You just have to believe the manufacturer on his word. Is that enough for you if it's about software that will get to know you intimately because it processes sensor readings and even camera images about you in your home? Not for me, so open source software is a hard requirement for my home automation setup.
But what when you're not a programmer and you wouldn't even understand the source code of your home automation system if you had access to it? Even then the use of open source software has a lot of advantages. It's not because you don't have the programming experience that others can't help. Most open source projects have a decentralized software development model that encourages open collaboration.
So if you find a bug in the software or see something wrong in its source code but don't have the programming experience needed to fix it, just report the bug on the issue tracker of the project, and hopefully, someone else in the project's community will step in and fix it. It all depends on the health of the project's community. But a good open source project has a vibrant community of developers and users who collaborate to continuously improve the software.
And open source doesn't just mean getting access to the source code, it's much more than that. For instance, when you know a specific software project is open source, you know that it doesn't arbitrarily restrict what you can do with it. The Open Source Definition even explicitly lists that the license of open source software must not discriminate against any person or group of persons, nor restrict anyone from making use of the program in a specific field of endeavour.
The decentralization and transparency of the open source development model gives power back to the users, where it belongs. For home automation that's even more important: I don't want a company having control over my house.
Self-sufficient
During the last ten years, there has been a worrying development in the computer industry: we all depend more and more on (centralized) cloud systems. Unfortunately, the home automation industry didn't escape this fate. Many popular home automation and IoT systems depend on a cloud server. Some examples:
the Ring video doorbell with Wi-Fi camera;
the Nest Learning Thermostat;
so-called 'smart speakers' running voice assistants, like Amazon Echo and Google Home;
the IFTTT service that links various other services.
This isn't without its problems. In the last couple of years some of these cloud services for home automation stopped working for their users:
In 2014 Nest bought the company that was selling the Revolv Hub home automation system, not long after Nest itself was acquired by Google. In 2016 Nest shut down the servers Revolv Hub depended on, after announcing it with a quiet note on the website of Revolv a few months earlier. That meant that the $300 Revolv Hub ceased functioning entirely.
At the end of 2019, Best Buy announced that several of their Insignia-branded smart devices would stop working because they decided to shut down the corresponding backend systems.
In May 2020 Wink (with the catchphrase "A simpler way to a smarter home") announced with just a week's notice that it would start charging a monthly fee for the use of their services. Users that didn't want to pay were no longer be able to access their Wink devices and their automations were disabled. The Wink Hub was rendered useless, although it had been in stores with the clear description "no required monthly fees, ever". Ironically, the announcement ended with the message "Our user community is integral to Wink, and we want to continue to be your trusted smart home provider." Yeah, right.
But fundamentally, the problem lies even deeper. It just makes no sense to use cloud services to automate your home. Home automation comes down to: you want one device to be able to respond to another device in your home. For instance: the motion sensor in your bathroom detects motion at night, and this turns the bathroom light on for five minutes. If you use IFTTT to link both devices, the motion sensor has to send a message to the internet, IFTTT relays the message to your bathroom light (for instance a Philips Hue light), and the bathroom light turns on.
But there's no need for an internet service like IFTTT between these devices because both devices are in your home, so it makes much more sense to link them locally, using a server at home. This could be a Raspberry Pi running home automation software that doesn't need a cloud server to function, but does all its processing on-device (or on the edge, as it's called now). You can perfectly do this with Node-RED or Home Assistant. Then there's no way a company can render your home automation system useless by shutting down their service, or your bathroom light doesn't turn on at night because your internet connection or IFTTT's servers are down. You're fully in control of your home automation
system.
There's another risk: using cloud services for your home automation system invades your privacy. Look at some of the privacy issues with the services I talked about above:
If you use the Ring video doorbell, it sends a video of everyone that steps on your porch to the manufacturer. The Ring company (which has been bought by Amazon in 2018) has a questionable approach to privacy: in January 2019 it was uncovered that employees have access to the video recordings of all Ring devices and even that the data are stored unencrypted.
If you use the Nest Learning Thermostat, Google knows precisely when you are home and when you aren't.
If you run a smart speaker like the Amazon Echo, what you tell your house members will be sent countless times inadvertently to Amazonbecause the Echo thinks it has heard its wake word. Moreover, Amazon's employees listen to a part of all 'conversations' with the Echo to improve its algorithms.
If you use the IFTTT service to link your various other services, you give one company access to all your home automation services, which is too much power concentrated in one company's hands: they can see exactly what you're doing.
After reading all this, do you still find it acceptable to use cloud services for your home automation?
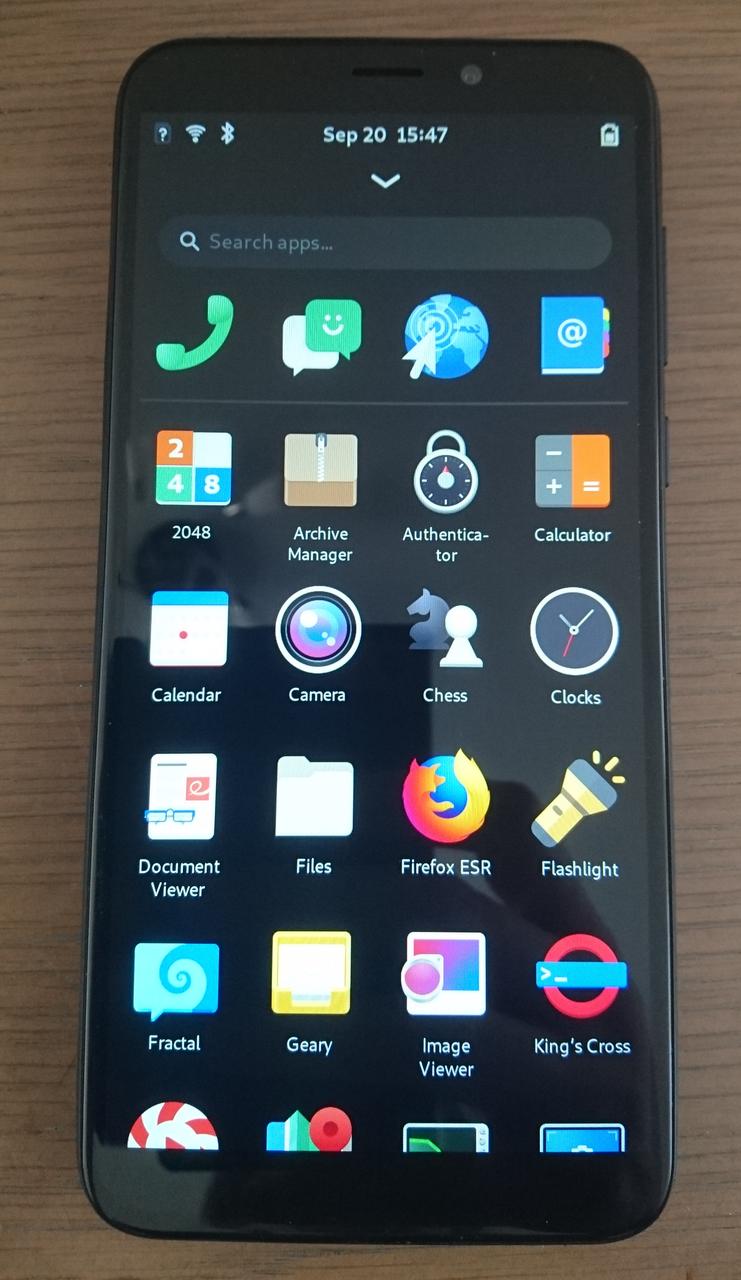
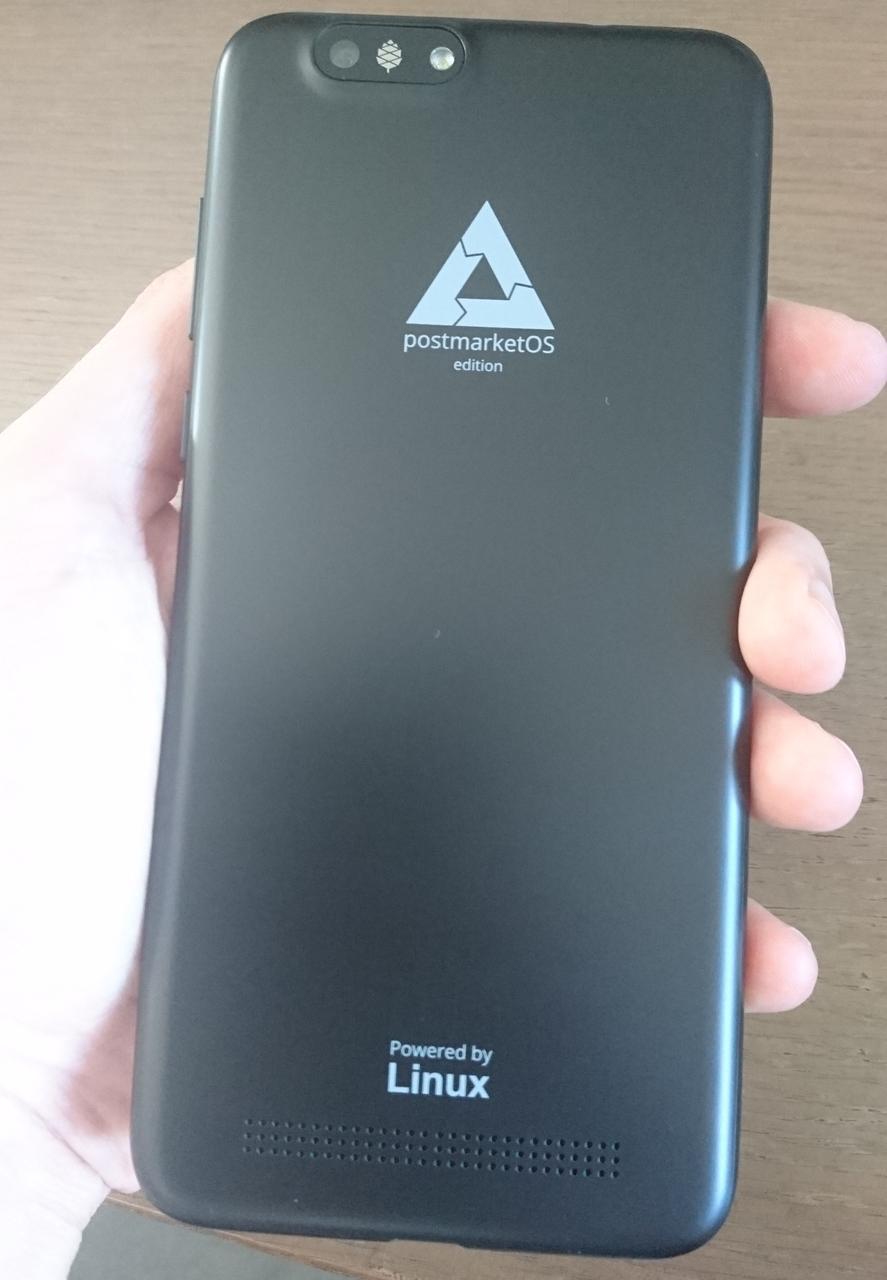
A few days ago my PinePhone arrived. It came with postmarketOS, which is based on Alpine Linux. By default it has a fairly limited set of apps. And if you look in the application manager, there are not many apps available to install either. With apk, Alpine's package manager, you can install a lot of other software. I installed Firefox this way, it seems to work, but you often need to zoom out to 50% to get the whole website on the screen.
But what I find most impressive is how this low-cost Linux phone has garnered extensive support from all major mobile Linux distributions. Who would have thought a few years ago that 'distro hopping' on a phone would be a thing?
Trying out some Linux distributions on the PinePhone
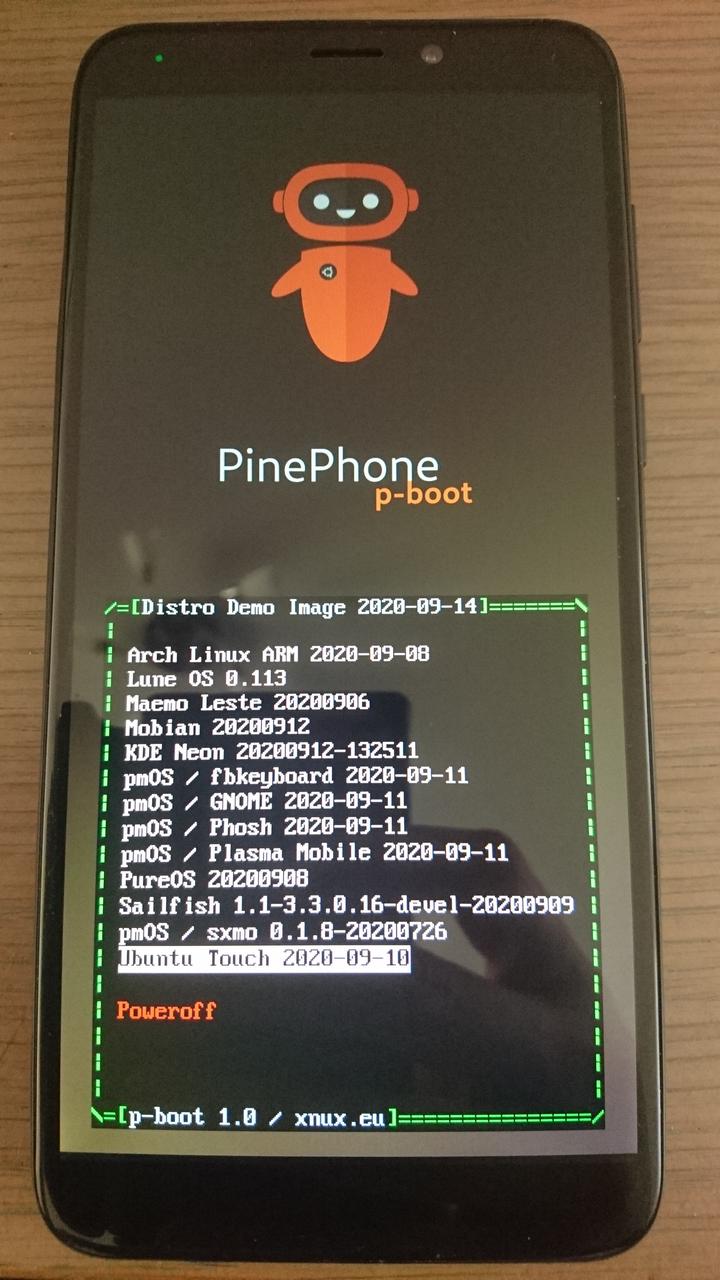
The easiest way to explore a lot of the supported distributions is the PinePhone multi-distro demo image, which is a 5 GB image with 13 distributions and a neat bootloader, p-boot.
So installed the multi-distro demo image on a spare microSD card with USBImager, resized the partition to the microSD card's full size and then I have been trying all 13 distributions for the last few days. These are my notes for the 2020-09-14 version of the image, not in any way systematic or complete:
[1]
Boots into a command line. I don't even see a virtual keyboard appearing to log in. This is not what I expect from a phone, but it's very understandable coming from the Arch Linux philosophy :-)
Has a bit more apps installed by default: maps, email, a PDF viewer, ... The maps app uses Google Maps data, but it doesn't work. I can't find general settings. It seems somewhat limited and basic things such as rebooting or shutting down don't work. LuneOS is based on webOS.
Boots into landscape mode, and I can't find how to change it to portrait mode. It has Vim and Htop installed by default, but they crash. There's no browser installed by default. It has an app manager, but it doesn't have a lot of apps available to install. The settings are fairly limited. The virtual keyboard is barely usable. Maemo Leste is the successor of Nokia's Maemo and it's currently an ARM64 port of Devuan (Debian without systemd).
Has a good set of default apps. It has both Web and Firefox installed as web browsers. There's a To Do app, Processor usage, Telegram (the Desktop version), Maps (using OpenStreetMap), Geary for email. There's also an Authenticator app, but it doesn't show anything. There's no terminal installed by default. [2] Software shows a lot of apps, and you get access to a lot of GNOME settings, including accounts, for instance to set up your email account (Geary uses the accounts you have set up here). It definitely feels Linux-like, but at the same time feels like a real mobile operating system. It's essentially just Debian for ARM64 with the Phosh user interface developed by Purism for the Librem 5, and it works surprisingly well.
Looks nice, there are but not many apps installed. I'm more familiar with the GNOME world, so I feel a bit lost here. There's Spacebar (to chat), Koko (music), Okular (document viewer), Konsole. Contrary to all other distributions I tried, there's a screenshot app in the drawer. But how does it work? I don't think I will get used to the Plasma Mobile interface. So while it looks like a perfectly usable system, it's not for me.
I hear a high-pitched sound when the PinePhone boots into the graphical environment. The virtual keyboard has awkwardly small buttons. There's a terminal installed. But the apps are not easy to access: if you open the application drawer, the icons suddenly fly off the screen, so the only way to start the apps is by typing an app's name in the search box. There are a lot of GNOME settings. However, the system doesn't seem to be adapted to a mobile screen: windows are shown only partially, even the GNOME initial setup window. All in all, this is not very usable in this state.
Also gives the high-pitched sound, but less long. There are not many apps preinstalled. There are also not many apps to install from Software. There are a lot of GNOME settings. Not all windows are adapted to the mobile screen size.
I hear a high-pitched sound when the PinePhone boots into the graphical environment. A limited set of preinstalled apps. The system doesn't seem to be very responsive. I couldn't even enter my Wi-Fi settings because the interface hangs when I want to open the settings window. Unusable in this state.
A nice lightweight alternative using suckless programs. Sxmo (Simple X Mobile) is actually a collection of simple programs and scripts to create a fully functional mobile user interface adhering to the Unix philosophy. It's a bit too minimalistic for me, but it works nicely to my surprise, controlling the user interface largely through the PinePhone's volume and power buttons and swipe gestures.
Has a limited set of apps. It seems to be better adapted to the mobile screen size than some of the other distributions. The default web browser is GNOME Web. There's no Firefox to install from the Software app. There seems to be an Iceweasel in the app, but it hasn't been updated since the version equivalent to Firefox 55! The available GNOME settings are rather limited.
Looks very nice. It has a very user-friendly user onboarding experience. There's a fairly limited set of installed apps. The user interface is closed source, so this is no option for me.
Looks very nice, it also a nice user onboarding experience. The default web browser is Morph. It also has a media player, weather app, music, terminal, navigation (uNav, but it didn't work for me, as it keeps "waiting for GPS"). It seems to be a bit slower to boot and less responsive than some of the other distributions. I also experienced some weird behaviour with the window placement.
Powered by Linux
The PinePhone supports even more Linux distributions: Fedora, Manjaro, Nemo Mobile (an open source build of Sailfish OS), NixOS, openSUSE and AVMultiPhone (basically postmarketOS with MATE). These are not (yet) available from the multi-distro demo image, and I haven't tried them yet.
As you see in my notes above, there are still a lot of issues if you want to use the PinePhone on a daily basis. [3] Most of them will probably be solved eventually: things seem to move very fast in this domain. Also, the fact that these are all just Linux distributions is extremely helpful. If you encounter a problem, you can have a look at dmesg, run systemctl list-units--state=failed and so on and you have the same powerful toolbox at your disposal as on the Linux desktop.
All in all, Mobian impressed me most, with PureOS as my second choice. So after distro hopping for the last few days, I'm going to do a clean install with Mobian and explore it further. The feeling of having freedom and control on my phone in a familiar environment is amazing. Powered by Linux!
This is because esptool.py is called as a Python 2 program, and Python 2 is deprecated. Ubuntu 20.04 doesn't even have pip anymore for Python 2, so you can't even install the serial module to solve this error.
There are two solutions to this problem: using Python 3 or Python 2.
Installing the module for Python 3
One solution is to create a symlink from /usr/bin/python to /usr/bin/python3. Ubuntu even has a package for this:
$ sudoaptinstallpython-is-python3
After this install the pyserial module:
$ pip3installpyserial
If you already have the serial module, you have to remove it first:
$ pip3uninstallserial
After this, try compiling your sketch again. This time the Arduino IDE calls esptool.py with Python 3, and thus finds the module you just installed with pip3.
Installing the module for Python 2
Another solution is to keep using Python 2 and thus installing the missing module with pip2. First enable the universe repository, where Python 2 has been moved to in Ubuntu 20.04:
$ sudoadd-apt-repositoryuniverse
Update your package list, install Python 2 if you don't have it (it's not included anymore by default in new Ubuntu installations, but the Arduino IDE would have shown you another error in that case) and then pip2:
After this, try compiling your sketch again. The Arduino IDE still calls esptool.py with Python 2, but this time it finds the module you just installed with pip2, so the error disappears.